The Ultimate Guide to Soil Types for Thriving Plants: From Clay to Loam and Beyond
Unearthing the Secrets of Healthy Soil
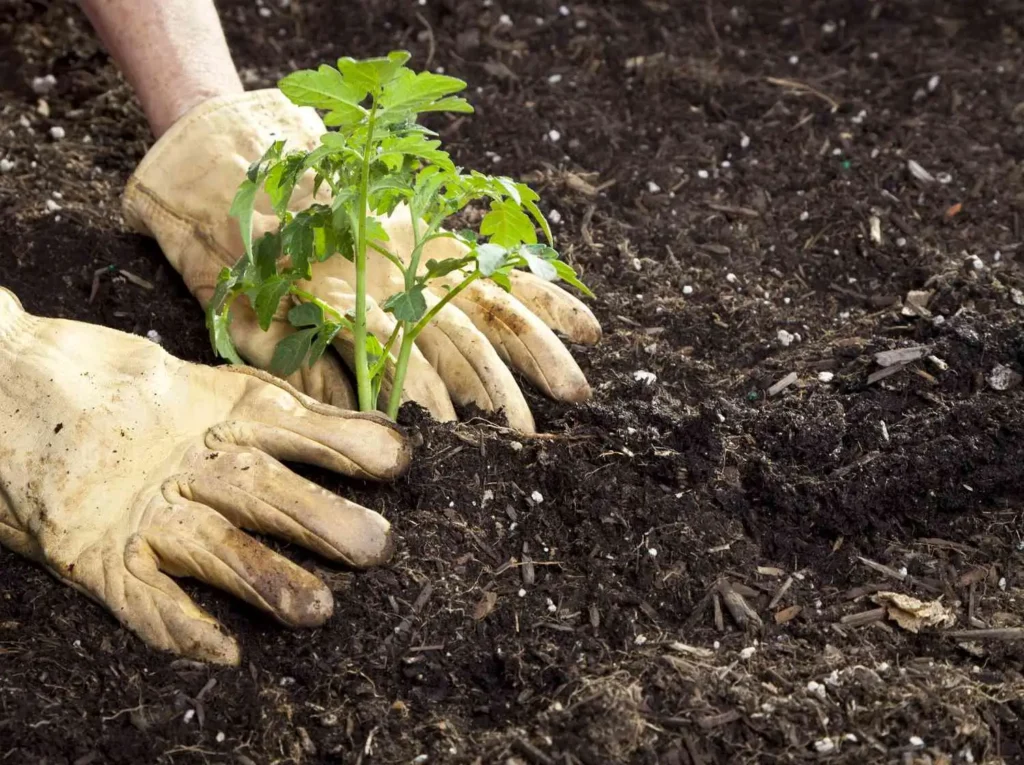
Welcome, fellow plant enthusiasts! Have you ever wondered why some plants flourish effortlessly while others struggle, even with the same care? The answer often lies beneath the surface, in the very foundation of their existence: soil. It’s more than just dirt; it’s a complex, living ecosystem that dictates how well your plants absorb water, nutrients, and oxygen. Understanding your soil type is not just a gardening tip; it’s a fundamental skill that unlocks the true potential of your green endeavors.
Why Soil Matters: The Foundation of Plant Life
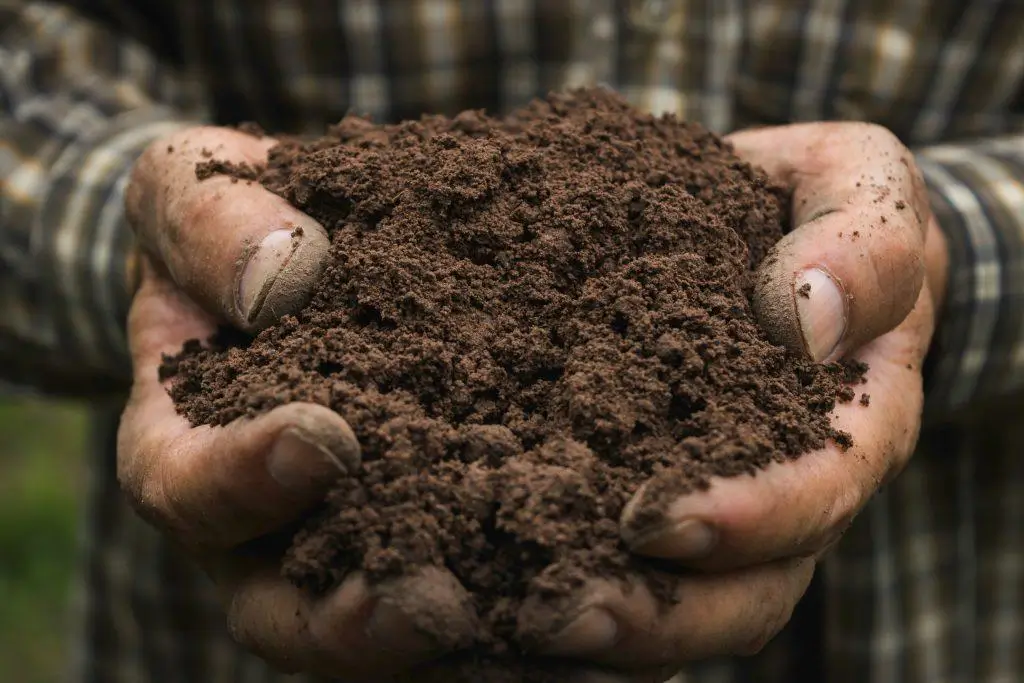
Soil is the unsung hero of every garden, providing the essential anchorage for roots, a reservoir for water, and a pantry for vital nutrients. Imagine trying to build a skyscraper on shifting sand or a swamp; similarly, plants cannot thrive without the right structural support and resource availability from their soil. The wrong soil type can lead to a myriad of problems, from stunted growth and nutrient deficiencies to root rot and pest infestations. Conversely, matching your plants to their ideal soil type, or amending your existing soil to meet their needs, can transform a struggling garden into a vibrant, productive oasis.
Beyond Dirt: Understanding Soil Composition
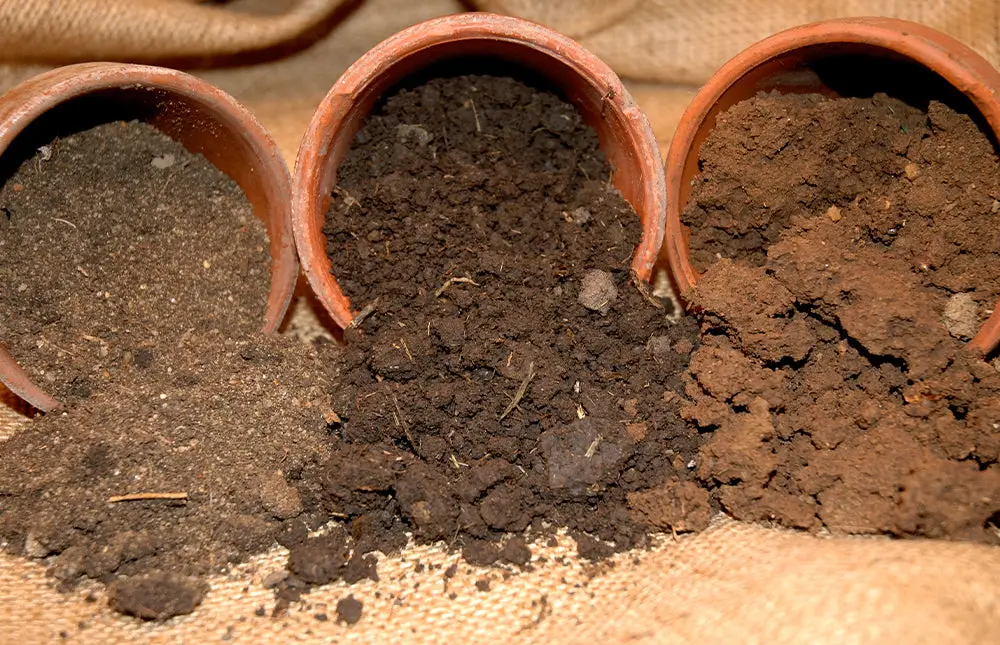
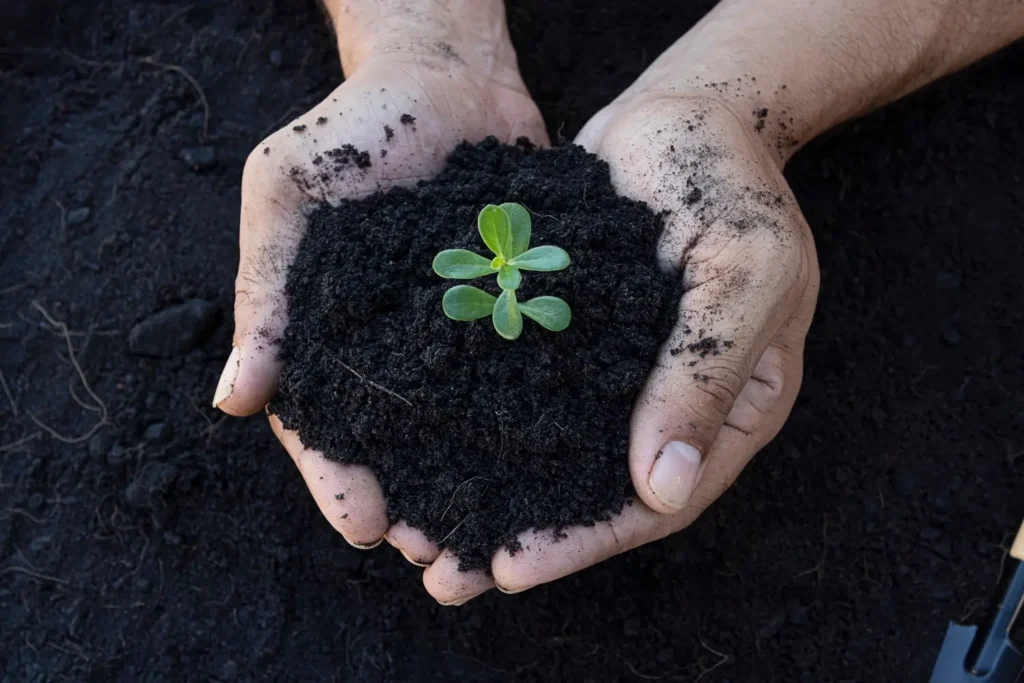
At its core, soil is a dynamic mixture of minerals, organic matter, water, and air. The mineral component is derived from weathered rocks and can be broadly categorized into three primary particle sizes: sand, silt, and clay. The proportion of these three particles determines your soil’s texture, which in turn influences its drainage, aeration, and nutrient-holding capacity. Organic matter, composed of decaying plant and animal material, enriches the soil, improves its structure, and provides a slow-release source of nutrients. Water and air fill the pore spaces between soil particles, crucial for root respiration and nutrient transport. Understanding this intricate composition is the first step towards becoming a true soil master.
What You’ll Learn in This Guide
This comprehensive guide will equip you with the knowledge and practical skills to understand, identify, and optimize your soil for unparalleled plant health. We’ll delve deep into the characteristics of the six primary soil types—clay, sand, silt, loam, peat, and chalk—and reveal which plants are best suited for each. You’ll discover simple yet effective methods for testing your soil’s texture and pH, empowering you to make informed decisions about amendments. Furthermore, we’ll explore advanced soil management techniques and troubleshoot common soil problems, ensuring your garden thrives like never before. Get ready to transform your gardening approach from guesswork to informed success!
The Six Primary Soil Types: Characteristics and Cultivation
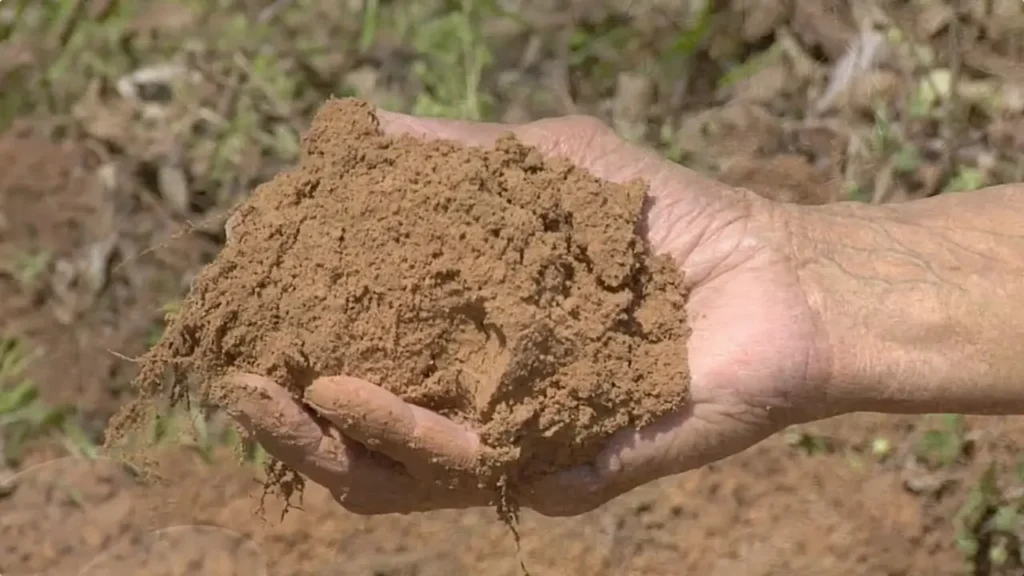
Clay Soil: The Nutrient Powerhouse
Clay soil, often characterized by its heavy, dense nature, is composed of the smallest soil particles. These microscopic particles pack together tightly, leaving very little space for air and water to move freely. When wet, clay soil feels sticky and can be molded into various shapes, while upon drying, it becomes hard and prone to cracking. This unique structure, however, is a double-edged sword, offering both significant advantages and considerable challenges for gardeners.
Defining Clay Soil: Fine Particles, High Density
Imagine a microscopic jigsaw puzzle where each piece is incredibly tiny and fits together with minimal gaps. That’s essentially clay soil. Its fine particle size, typically less than 0.002 mm in diameter, gives it a high surface area. This characteristic is crucial because it allows clay to hold onto water and nutrients with remarkable efficiency. However, this same property also contributes to its density and tendency to compact, making it difficult for roots to penetrate and for water to drain.
Pros: Nutrient Retention and Water Holding Capacity
One of the most significant benefits of clay soil is its exceptional ability to retain both nutrients and water. The negatively charged surfaces of clay particles attract and hold onto positively charged nutrient ions, preventing them from leaching away with rainfall. This means that clay soils are often naturally rich in essential plant nutrients like calcium, potassium, and magnesium. Furthermore, their tight structure allows them to hold a substantial amount of water, making them more drought-resistant than sandy soils. This can be a huge advantage in drier climates or during periods of low rainfall.
Cons: Poor Drainage, Compaction, and Workability Challenges
Despite its nutrient-rich nature, clay soil presents several challenges. Its poor drainage is a major concern, as water can sit on the surface or remain waterlogged, leading to root rot and oxygen deprivation for plants. The density of clay also makes it prone to compaction, especially when walked on or worked with heavy machinery, further exacerbating drainage and aeration issues. Moreover, clay soil can be incredibly difficult to work with; it’s heavy to dig, sticky when wet, and forms hard clods when dry, making planting and cultivation a laborious task.
Improving Clay Soil: Organic Matter, Gypsum, and Raised Beds
The key to transforming challenging clay soil into a fertile, workable medium lies in improving its structure. The most effective amendment is organic matter—compost, well-rotted manure, leaf mold, or shredded bark. Organic matter acts like a sponge, creating larger pore spaces that improve drainage and aeration while simultaneously enhancing nutrient retention. For extremely heavy clay, gypsum can be used to help flocculate (clump together) clay particles, making the soil more granular. Another excellent strategy is to create raised beds, which allow you to introduce a custom, well-draining soil mix without having to extensively amend your native clay.
Plants That Thrive in Clay Soil: A Comprehensive List
While clay soil can be challenging, many plants absolutely adore its nutrient-rich, moisture-retentive properties. Here’s a selection of plants that are known to thrive in clay:
- Trees: Oak (Quercus spp.), Maple (Acer spp.), Willow (Salix spp.), Ash (Fraxinus spp.), Birch (Betula spp.), Hawthorn (Crataegus spp.), Dogwood (Cornus spp.)
- Shrubs: Viburnum, Forsythia, Hydrangea, Spirea, Lilac (Syringa vulgaris), Rose (Rosa spp.), Elderberry (Sambucus spp.), Weigela
- Perennials: Hosta, Daylily (Hemerocallis spp.), Aster, Coneflower (Echinacea purpurea), Black-Eyed Susan (Rudbeckia hirta), Sedum, Siberian Iris (Iris sibirica), Bee Balm (Monarda didyma), Bleeding Heart (Dicentra spectabilis)
- Vegetables: Cabbage, Broccoli, Brussels Sprouts, Kale, Beans, Peas, Potatoes, Tomatoes (with good drainage), Corn, Lettuce, Spinach
- Fruits: Pears, Plums, Cherries, Raspberries, Blackberries
By selecting appropriate plants and consistently improving your clay soil with organic matter, you can turn this often-maligned soil type into a highly productive garden asset.
Sandy Soil: The Fast Drainer
Sandy soil is at the opposite end of the spectrum from clay, characterized by its large, coarse particles. These particles create abundant pore spaces, allowing water to drain rapidly and air to circulate freely. While this makes sandy soil easy to work with, it also presents challenges related to nutrient retention and moisture availability. Understanding these characteristics is vital for successful gardening in sandy conditions.
Defining Sandy Soil: Large Particles, Rapid Drainage
Imagine a beach, and you have a good mental picture of sandy soil. Its particles are relatively large, typically ranging from 0.05 mm to 2 mm in diameter, giving it a gritty feel. The significant spaces between these particles mean that water passes through quickly, often carrying dissolved nutrients with it. This rapid drainage is a defining feature, making sandy soils
highly permeable. While this prevents waterlogging, it also means that sandy soils dry out quickly and struggle to hold onto essential plant nutrients.
Pros: Easy to Work, Warms Quickly
One of the most appealing aspects of sandy soil is its ease of cultivation. It’s light, crumbly, and doesn’t compact easily, making it a joy to dig, plant, and weed. Roots can penetrate sandy soil with minimal effort, allowing for robust root development. Furthermore, sandy soils tend to warm up much faster in the spring compared to heavier clay soils. This early warming can be a significant advantage for gardeners looking to get a head start on their planting season, especially for crops that prefer warmer soil temperatures.
Cons: Low Nutrient Retention, Drought Proneness
The large pore spaces that make sandy soil easy to work with are also its biggest drawback. Nutrients, being highly soluble, are easily leached away by rainfall or irrigation, leading to nutrient deficiencies in plants. This poor nutrient retention means sandy soils often require more frequent fertilization. Coupled with its rapid drainage, sandy soil is highly susceptible to drought. Plants growing in sandy soil will need more frequent watering, especially during hot, dry periods, to prevent wilting and stress.
Improving Sandy Soil: Boosting Organic Matter, Mulching, and Strategic Watering
The most effective way to improve sandy soil is to significantly increase its organic matter content. Incorporating generous amounts of compost, well-rotted manure, or other organic materials will dramatically enhance its water-holding capacity and nutrient retention. Organic matter acts like a sponge, binding the loose sand particles together and creating a more hospitable environment for plant roots. Mulching with organic materials like wood chips or straw will further help conserve moisture, suppress weeds, and slowly release nutrients as it decomposes. Additionally, adopting strategic watering practices, such as deep and infrequent watering, can encourage roots to grow deeper, making plants more resilient to dry spells.
Plants That Thrive in Sandy Soil: A Comprehensive List
Despite its challenges, many plants are perfectly adapted to sandy conditions, often preferring the excellent drainage and warmth it provides. Here are some examples:
- Vegetables: Carrots, Radishes, Potatoes, Asparagus, Corn, Lettuce, Zucchini, Melons, Peas, Beans
- Fruits: Strawberries, Blueberries (with pH adjustment), Grapes, Watermelons
- Herbs: Rosemary, Thyme, Lavender, Oregano, Sage, Marjoram
- Flowers: Succulents (Sedum, Sempervivum), Lavender, Coneflower (Echinacea), Gaillardia, Coreopsis, Daylilies, Dianthus, Yarrow
- Trees & Shrubs: Pine (Pinus spp.), Juniper (Juniperus spp.), Birch (Betula spp.), Oak (Quercus spp.), Sumac (Rhus spp.), Broom (Cytisus spp.), Manzanita (Arctostaphylos spp.)
By understanding the unique properties of sandy soil and implementing appropriate amendments and watering strategies, you can cultivate a thriving garden filled with plants that appreciate its fast-draining nature.
Silt Soil: The Smooth Operator
Silt soil occupies a middle ground between sandy and clay soils in terms of particle size. Its particles are finer than sand but coarser than clay, giving it a distinctive smooth, flour-like feel when dry and a slippery, soapy feel when wet. This unique texture contributes to both its advantages and disadvantages in the garden, making it a soil type that requires careful management to optimize for plant growth.
Defining Silt Soil: Medium Particles, Smooth Texture
Silt particles range in size from 0.002 mm to 0.05 mm, placing them squarely between sand and clay. This intermediate size means that silt soil can retain more moisture and nutrients than sandy soil, but it also drains better than heavy clay. When you rub silt soil between your fingers, it feels smooth and powdery, lacking the grittiness of sand or the stickiness of clay. This characteristic texture is a key indicator of its presence in your garden.
Pros: Good Water Retention, More Nutrients than Sand
One of the primary benefits of silt soil is its excellent water retention capabilities. It holds moisture more effectively than sandy soil, providing a more consistent water supply to plant roots. Furthermore, silt soils tend to be more fertile than sandy soils, containing a higher concentration of nutrients due to their smaller particle size and increased surface area. This combination of good moisture retention and moderate nutrient availability makes silt soil a relatively productive medium for a wide range of plants.
Cons: Compaction, Erosion Risk
Despite its advantages, silt soil is not without its challenges. Its fine particles are highly susceptible to compaction, especially when subjected to foot traffic, heavy rain, or garden machinery. Once compacted, silt soil can become dense and impenetrable, hindering root growth and reducing drainage. Another significant concern is its vulnerability to erosion. Silt particles are easily carried away by wind and water, particularly on sloped terrain or when left exposed without plant cover. This can lead to significant topsoil loss and reduced fertility over time.
Improving Silt Soil: Preventing Compaction, Enhancing Structure with Organic Matter
To maximize the potential of silt soil, preventing compaction and enhancing its structure are paramount. Regular incorporation of organic matter is the most effective strategy. Compost, well-rotted manure, or cover crops will help to bind the fine silt particles into larger, more stable aggregates, improving aeration, drainage, and overall soil structure. Avoiding working the soil when it’s wet, minimizing foot traffic, and using raised beds can also help prevent compaction. Planting cover crops during off-seasons can protect the soil from erosion and add valuable organic matter when tilled in.
Plants That Thrive in Silt Soil: A Comprehensive List
Silt soil, with its balanced moisture and nutrient profile, can support a diverse array of plants. Here are some that particularly flourish in silty conditions:
- Vegetables: Broccoli, Cabbage, Cauliflower, Lettuce, Spinach, Onions, Potatoes, Sweet Corn, Beans, Peas
- Fruits: Strawberries, Raspberries, Blueberries (with pH adjustment)
- Flowers: Astilbe, Bleeding Heart (Dicentra spectabilis), Daylily (Hemerocallis spp.), Hosta, Iris, Liatris, Peonies, Phlox, Primrose
- Trees & Shrubs: Birch (Betula spp.), Willow (Salix spp.), Cypress (Cupressus spp.), Maple (Acer spp.), Poplar (Populus spp.), Dogwood (Cornus spp.), Hydrangea, Rhododendron (with pH adjustment)
By implementing thoughtful management practices, you can harness the natural fertility and moisture-holding capacity of silt soil to cultivate a thriving and productive garden.
Loam Soil: The Gardener’s Dream
Loam soil is often hailed as the ideal soil type for gardening, a perfect blend of sand, silt, and clay particles. This balanced composition results in a soil that offers the best characteristics of all three, providing optimal conditions for most plants to thrive. If you have loam soil, consider yourself fortunate, as it requires less intensive amendment than other soil types.
Defining Loam Soil: The Perfect Balance
True loam soil typically consists of approximately 40% sand, 40% silt, and 20% clay. This precise ratio creates a soil structure that is both well-draining and moisture-retentive, while also being rich in nutrients. When you pick up loam soil, it should feel soft, crumbly, and somewhat spongy. It forms a loose ball when squeezed but easily breaks apart with a gentle touch, indicating excellent aeration and workability. This balanced texture is what makes loam so desirable for a wide variety of plants.
Pros: Optimal Drainage, Aeration, and Nutrient Availability
Loam soil excels in providing the trifecta of essential plant needs: excellent drainage, good aeration, and high nutrient availability. The sand component ensures good drainage, preventing waterlogging and promoting healthy root development. Silt contributes to moisture retention and nutrient-holding capacity, while clay provides additional nutrients and helps bind the soil particles into stable aggregates. This combination allows roots to access both water and oxygen efficiently, leading to vigorous plant growth and higher yields. Furthermore, loam soil is typically rich in organic matter, which further enhances its fertility and microbial activity.
Cons: Requires Ongoing Maintenance
While loam soil is often considered perfect, it’s not entirely maintenance-free. To maintain its optimal structure and fertility, regular additions of organic matter are still beneficial, especially if you are intensively cultivating or harvesting from your garden. Over time, even the best loam can become depleted of nutrients or experience some compaction if not properly cared for. Therefore, consistent attention to soil health, through practices like composting and mulching, is key to preserving its ideal qualities.
Maintaining Loam Soil: Regular Organic Matter Additions
The best way to maintain the health and productivity of loam soil is through consistent incorporation of organic matter. Adding a layer of compost, well-rotted manure, or other organic amendments annually will replenish nutrients, improve microbial activity, and prevent any gradual decline in soil structure. Avoiding excessive tilling and minimizing compaction from foot traffic or heavy machinery will also help preserve the natural balance of loam. By nurturing your loam soil, you ensure its continued ability to support a thriving garden for years to come.
Plants That Thrive in Loam Soil: A Comprehensive List
Given its balanced properties, loam soil is suitable for almost any plant. However, some plants particularly flourish in these ideal conditions:
- Vegetables: Most vegetables, including Tomatoes, Peppers, Lettuce, Carrots, Onions, Potatoes, Corn, Cabbage, Broccoli, Beans, Peas, Cucumbers, Zucchini, Eggplant
- Fruits: Strawberries, Raspberries, Blueberries, Apples, Pears, Cherries, Grapes
- Herbs: All common herbs, including Basil, Mint, Parsley, Cilantro, Thyme, Rosemary, Oregano, Sage
- Flowers: Most annuals and perennials, including Roses, Tulips, Daffodils, Hostas, Daylilies, Peonies, Sunflowers, Zinnias, Marigolds, Petunias, Geraniums
- Trees & Shrubs: Most deciduous and evergreen trees and shrubs, including Maples, Oaks, Birches, Dogwoods, Hydrangeas, Rhododendrons, Azaleas, Lilacs
Loam soil truly is the gardener’s dream, providing a versatile and forgiving medium that allows a vast array of plants to reach their full potential.
Peat Soil: The Acidic Sponge
Peat soil is a unique and distinctive soil type, formed over thousands of years from the decomposition of organic matter in waterlogged conditions, typically in bogs or fens. It is characterized by its dark color, high organic content, and spongy texture. While naturally occurring peatlands are vital ecosystems, peat soil in a garden context presents specific characteristics that gardeners need to understand and manage.
Defining Peat Soil: High Organic Content, Acidic Nature
Peat soil is essentially partially decomposed plant material, rich in organic carbon. Its formation occurs in anaerobic (oxygen-deprived) environments, which slows down the decomposition process significantly. This results in a soil that is very dark brown to black, lightweight, and has a distinct spongy feel due to its high water-holding capacity. A defining characteristic of peat soil is its naturally acidic pH, often ranging from 3.5 to 5.5, which is a crucial factor in determining what plants will thrive in it.
Pros: Excellent Water Retention, Lightweight
The most notable advantage of peat soil is its exceptional ability to retain water. It can hold many times its weight in water, making it an excellent medium for plants that require consistently moist conditions. This high water retention also means less frequent watering, which can be a benefit in certain gardening scenarios. Additionally, peat soil is incredibly lightweight, making it easy to work with and ideal for container gardening or raised beds where weight is a consideration.
Cons: High Acidity, Poor Drainage if Not Managed
The high acidity of peat soil is a significant limitation for many plants, as most garden plants prefer a more neutral pH. While some specialized plants thrive in acidic conditions, others will suffer from nutrient deficiencies if grown in unamended peat. Furthermore, despite its water-holding capacity, peat soil can become waterlogged if drainage is not properly managed. Its fine, dense structure can sometimes impede proper aeration, leading to anaerobic conditions that are detrimental to root health.
Improving Peat Soil: pH Adjustment, Drainage Solutions
Managing peat soil effectively involves addressing its acidity and ensuring proper drainage. To broaden the range of plants you can grow, you will likely need to adjust the pH by adding alkaline amendments such as garden lime. The amount of lime needed will depend on the current pH and your target pH. For drainage, incorporating coarse materials like sand or perlite can help improve aeration and prevent waterlogging. Additionally, adding well-rotted compost can further enhance its structure and provide a more balanced nutrient profile.
Plants That Thrive in Peat Soil: A Comprehensive List
Plants that naturally prefer acidic conditions are particularly well-suited for peat soil. Here are some examples:
- Acid-Loving Plants: Blueberries, Cranberries, Azaleas, Rhododendrons, Camellias, Heather, Ferns, Hydrangeas (especially for blue varieties)
- Vegetables (with pH adjustment): Potatoes, Carrots, Legumes, Salad crops (lettuce, spinach), Onions
- Trees & Shrubs: Birch (Betula spp.), Willow (Salix spp.), Cypress (Cupressus spp.), Spruce (Picea spp.), Fir (Abies spp.)
For gardeners willing to manage its specific requirements, peat soil can be a highly rewarding medium, especially for cultivating acid-loving plants that might struggle in other soil types.
Chalky Soil: The Alkaline Challenge
Chalky soil is distinctively characterized by its high content of calcium carbonate, derived from underlying chalk or limestone bedrock. This geological origin gives chalky soil a naturally alkaline pH, often above 7.0, which significantly influences its properties and the types of plants that can thrive within it. While it offers good drainage, its alkalinity and often shallow nature present unique challenges for gardeners.
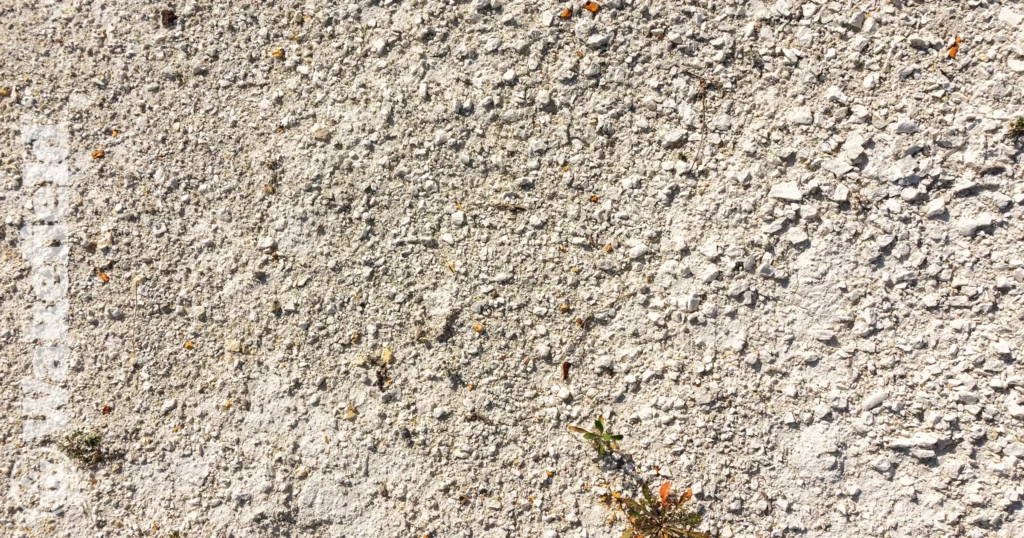
Defining Chalky Soil: High Calcium Carbonate Content, Alkaline pH
Chalky soil typically appears light-colored, often with visible white or grey chalk fragments or stones. It feels gritty and stony to the touch. The high calcium carbonate content means that chalky soils are inherently alkaline, making them unsuitable for acid-loving (ericaceous) plants. These soils are often shallow, sitting directly over bedrock, which can limit root development and nutrient availability. Despite their stony appearance, they can be surprisingly fertile if organic matter is present.
Pros: Good Drainage
One of the main advantages of chalky soil is its excellent drainage. The large chalk particles and stony nature prevent waterlogging, allowing excess water to drain away quickly. This makes chalky soil less prone to compaction and provides good aeration for plant roots. For plants that prefer well-drained conditions and are susceptible to root rot in heavier soils, chalky soil can be an ideal environment.
Cons: Nutrient Deficiencies, Drought Proneness, Inhospitable to Acid-Loving Plants
The high alkalinity of chalky soil is its most significant drawback. Many essential plant nutrients, such as iron, manganese, and phosphorus, become less available to plants at high pH levels, leading to nutrient deficiencies (often visible as yellowing leaves or stunted growth). Furthermore, due to its good drainage and often shallow depth, chalky soil can be prone to drying out quickly, especially during hot, dry spells, making plants susceptible to drought stress. And, as mentioned, acid-loving plants simply cannot thrive in these conditions.
Improving Chalky Soil: Adding Organic Matter, Selecting Adapted Plants
Amending chalky soil primarily focuses on improving its fertility and water retention, as significantly altering its pH is often impractical or temporary. Incorporating generous amounts of organic matter—compost, well-rotted manure, or leaf mold—is crucial. Organic matter helps to buffer the pH, improve nutrient availability, and enhance water retention. It also provides a more hospitable environment for beneficial soil microorganisms. However, the most practical approach for gardening in chalky soil is to select plants that are naturally adapted to alkaline conditions.
Plants That Thrive in Chalky Soil: A Comprehensive List
Many beautiful and resilient plants are perfectly suited to the challenges of chalky soil. Here are some excellent choices:
- Trees: Beech (Fagus sylvatica), Ash (Fraxinus excelsior), Sycamore (Acer pseudoplatanus), Field Maple (Acer campestre), Hawthorn (Crataegus monogyna), Whitebeam (Sorbus aria)
- Shrubs: Lilac (Syringa vulgaris), Mock Orange (Philadelphus spp.), Viburnum, Cotoneaster, Lavender (Lavandula spp.), Rosemary (Rosmarinus officinalis), Buddleja, Spirea
- Perennials: Geranium (Cranesbill), Pinks (Dianthus spp.), Lavender, Sedum, Euphorbia, Achillea, Gypsophila, Iris, Valerian, Poppy (Papaver spp.), Clematis
- Vegetables: Cabbage, Broccoli, Brussels Sprouts, Kale, Spinach, Beets, Asparagus, Peas, Beans
- Fruits: Cherries, Plums, Pears, Figs
By embracing the unique characteristics of chalky soil and choosing the right plants, you can create a stunning and low-maintenance garden that flourishes in these challenging conditions.
Understanding Your Soil: Practical Tests and Analysis
Knowing your soil type is the first crucial step towards successful gardening. While a professional soil analysis provides the most accurate data, several simple, hands-on tests can give you a good indication of your soil’s texture and composition right in your backyard. These practical tests are invaluable for making informed decisions about soil amendments and plant selection.
The Jar Test: Unveiling Your Soil’s Texture
The jar test is a classic and highly effective method for determining the proportions of sand, silt, and clay in your soil. It’s a visual and relatively precise way to understand your soil’s textural makeup.
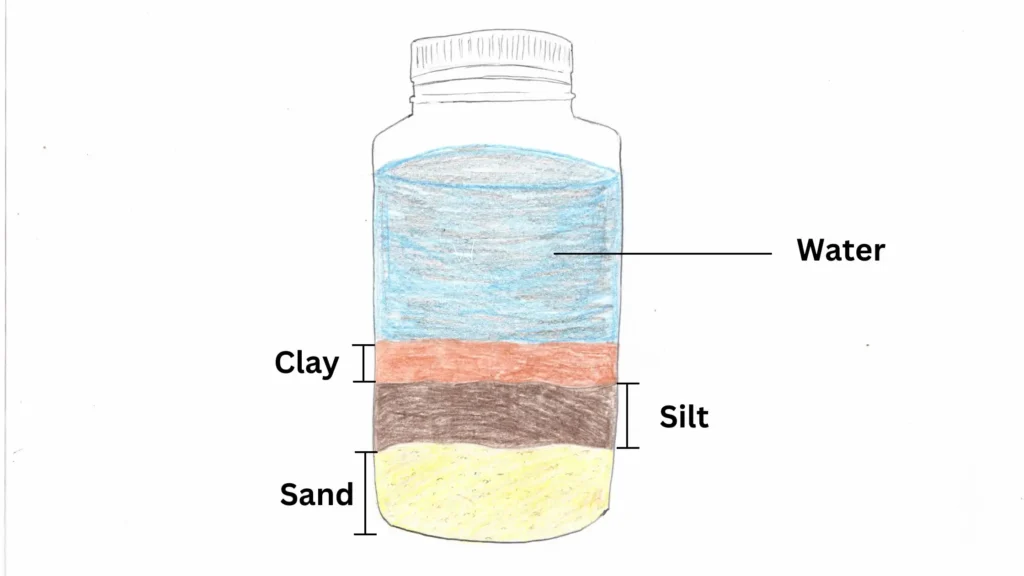
How to Perform the Jar Test:
- Collect Your Sample: Dig down about 6-8 inches into your garden bed and collect a representative soil sample. Remove any large debris like rocks, roots, or organic matter. You’ll need about 1-2 cups of soil.
- Prepare the Jar: Find a clear, straight-sided jar with a tight-fitting lid (a quart-sized canning jar works perfectly). Place your soil sample into the jar.
- Add Water and Shake: Fill the jar with water, leaving about 2-3 inches of space at the top. Add a teaspoon of dishwashing detergent (this helps to break apart soil clumps and separate the particles). Secure the lid tightly and shake the jar vigorously for several minutes until all the soil clumps are thoroughly broken up and suspended in the water.
- Observe and Measure:
- After 1 minute: The largest and heaviest particles, sand, will settle at the bottom. Mark this layer’s height on the side of the jar.
- After 2 hours: The next layer to settle will be silt. Mark its height above the sand layer.
- After 24-48 hours (or longer): The smallest and lightest particles, clay, will settle on top of the silt layer. The water above may still appear cloudy due to suspended organic matter or very fine clay particles. Mark the clay layer’s height.
- Calculate Percentages: Measure the height of each layer (sand, silt, clay) and the total height of all settled soil. Divide the height of each layer by the total height and multiply by 100 to get the percentage of each component. For example, if your sand layer is 2 inches and the total settled soil is 5 inches, you have 40% sand.
Interpreting Your Results:
- High Sand Percentage: Indicates sandy soil, which drains quickly and has low nutrient retention.
- High Silt Percentage: Suggests silty soil, which holds water well but can compact easily.
- High Clay Percentage: Points to clay soil, which is nutrient-rich but prone to poor drainage and compaction.
- Balanced Proportions (around 40% sand, 40% silt, 20% clay): You likely have desirable loam soil.
The Feel Test: A Hands-On Approach to Soil Identification
The feel test is a quick, tactile method that complements the jar test, allowing you to assess your soil’s texture by touch. It’s a great way to get an immediate sense of your soil’s characteristics.

How to Perform the Feel Test:
- Moisten a Sample: Take a small handful of soil and moisten it with water until it’s damp but not dripping wet. It should be moldable.
- Rub Between Fingers: Rub the damp soil between your thumb and forefinger.
- Gritty: If it feels very gritty and falls apart easily, it’s likely sandy soil.
- Smooth/Silky: If it feels smooth, silky, or floury, and forms a ribbon but breaks easily, it’s likely silty soil.
- Sticky/Plastic: If it feels sticky, can be rolled into a long, thin ribbon, and holds its shape well, it’s likely clay soil.
- Balanced/Crumbly: If it feels somewhat gritty, somewhat smooth, and forms a loose ball that crumbles easily, you probably have loam soil.
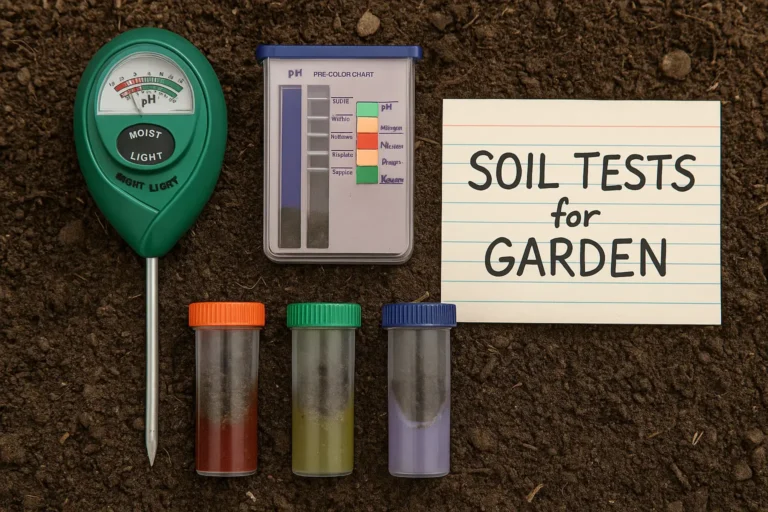
Professional Soil Testing: What It Is and Why It’s Important
While the jar and feel tests are excellent for determining soil texture, they don’t provide information on nutrient levels, organic matter content, or precise pH. For a truly comprehensive understanding of your soil’s health, professional soil testing is indispensable.
What a Professional Soil Test Reveals:
- Precise pH Level: Crucial for understanding nutrient availability.
- Macronutrient Levels: Nitrogen (N), Phosphorus (P), Potassium (K) – the primary nutrients plants need in large quantities.
- Micronutrient Levels: Iron, Manganese, Zinc, Copper, Boron, etc. – essential nutrients needed in smaller amounts.
- Organic Matter Content: Indicates the soil’s fertility and water-holding capacity.
- Cation Exchange Capacity (CEC): A measure of the soil’s ability to hold onto and supply nutrients.
- Salinity: Important for arid regions or areas with irrigation issues.
Why It’s Important:
Professional soil tests provide a scientific basis for making targeted amendments. Instead of guessing what your soil needs, you’ll receive specific recommendations for fertilizers, lime, or other amendments to correct deficiencies or imbalances. This not only leads to healthier plants but also prevents over-application of chemicals, saving money and protecting the environment. Most local university extension offices offer affordable soil testing services, providing detailed reports and tailored advice for your region.
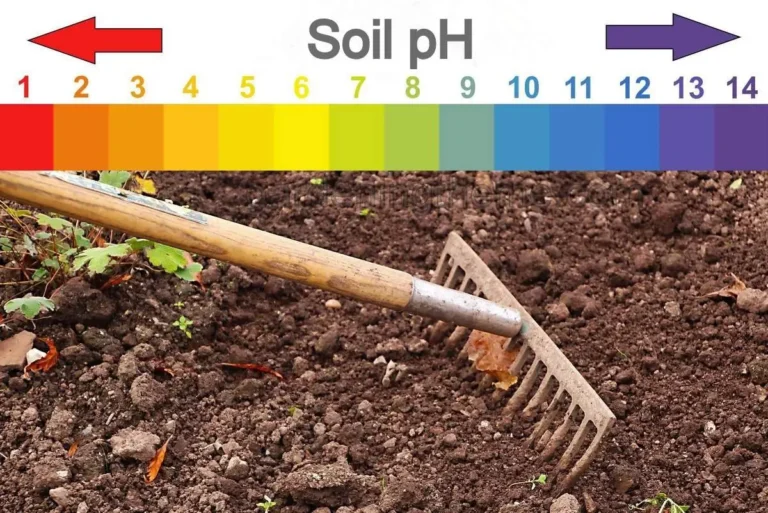
The Crucial Role of Soil pH: Balancing Acidity and Alkalinity
Beyond its physical texture, the chemical characteristic of soil that most profoundly impacts plant health is its pH level. Soil pH, a measure of its acidity or alkalinity, dictates the availability of essential nutrients to plants. Understanding and managing your soil’s pH is as critical as knowing its type, as even the most fertile soil can hinder plant growth if its pH is out of balance.

What is Soil pH and Why Does It Matter?
Soil pH is measured on a scale from 0 to 14, where 7 is neutral. A pH below 7 indicates acidity, while a pH above 7 indicates alkalinity (or basicity). This seemingly simple number has a profound effect on how plants absorb nutrients. Most essential plant nutrients are most available in a slightly acidic to neutral pH range (typically between 6.0 and 7.0). When the pH deviates significantly from this ideal range, certain nutrients become
locked up or become toxic, even if they are present in the soil. For example, iron and manganese become less available in alkaline soils, leading to deficiencies, while aluminum can become toxic in highly acidic soils.
Measuring Soil pH: DIY Kits vs. Lab Tests
Accurately measuring your soil pH is the first step in managing it. You have a couple of options:
- DIY pH Test Kits: These are readily available at garden centers and provide a quick, inexpensive way to get an approximate pH reading. They typically involve mixing a small soil sample with water and then adding a chemical indicator or using a probe. While convenient, their accuracy can vary, and they don’t provide information on nutrient levels.
- Professional Lab Tests: As mentioned in the previous section, professional soil testing services (often through university extension offices) offer the most accurate and comprehensive analysis. They use precise laboratory equipment to determine your soil’s exact pH, along with detailed reports on nutrient availability and recommendations for amendments. This is the recommended method for serious gardeners or if you’re experiencing persistent plant health issues.
Adjusting Soil pH: Raising and Lowering Acidity
Once you know your soil’s pH, you can take steps to adjust it to suit your plants’ needs. It’s important to note that pH adjustment is a gradual process and often requires ongoing maintenance.
Increasing pH (Making Soil More Alkaline)
If your soil is too acidic for your desired plants, you can raise its pH by adding alkaline amendments. The most common and effective material is agricultural lime (calcium carbonate). Dolomitic lime, which also contains magnesium, is another option. Gypsum (calcium sulfate) can also be used, particularly for improving soil structure in clay soils, but it has a less significant impact on pH. Always follow application rates recommended by your soil test results, as over-liming can lead to nutrient deficiencies.
Decreasing pH (Making Soil More Acidic)
To lower soil pH and make it more acidic, you can incorporate materials such as elemental sulfur, aluminum sulfate, or iron sulfate. Elemental sulfur works slowly as soil bacteria convert it to sulfuric acid. Aluminum sulfate and iron sulfate act more quickly but can be more expensive and may lead to aluminum toxicity if over-applied. Organic amendments like peat moss (sphagnum peat) and pine needles can also gradually lower pH as they decompose, though their effect is less dramatic than chemical amendments.
Plants and Their pH Preferences: A Quick Reference Guide
Different plants have different pH preferences, reflecting their natural growing environments. Here’s a general guide:
| pH Range | Description | Examples of Plants That Thrive |
|---|---|---|
| 4.5 – 5.5 | Strongly Acidic | Blueberries, Azaleas, Rhododendrons, Camellias, Hydrangeas (for blue flowers), Ferns, Conifers |
| 5.5 – 6.5 | Slightly Acidic | Most Vegetables (e.g., Tomatoes, Peppers, Carrots), Strawberries, Raspberries, Potatoes, Corn, Apples, Pears, Oaks, Maples, Roses |
| 6.5 – 7.5 | Neutral to Slightly Alkaline | Most Grains, Asparagus, Cabbage, Broccoli, Cauliflower, Spinach, Beets, Lilacs, Mock Oranges, Clematis |
| 7.5 – 8.5 | Moderately Alkaline | Lavender, Rosemary, Dianthus, Many Mediterranean Herbs, Some Ornamental Grasses, Juniper, Hawthorn |
Understanding and managing soil pH is a cornerstone of successful gardening, allowing you to create an environment where your chosen plants can truly flourish.
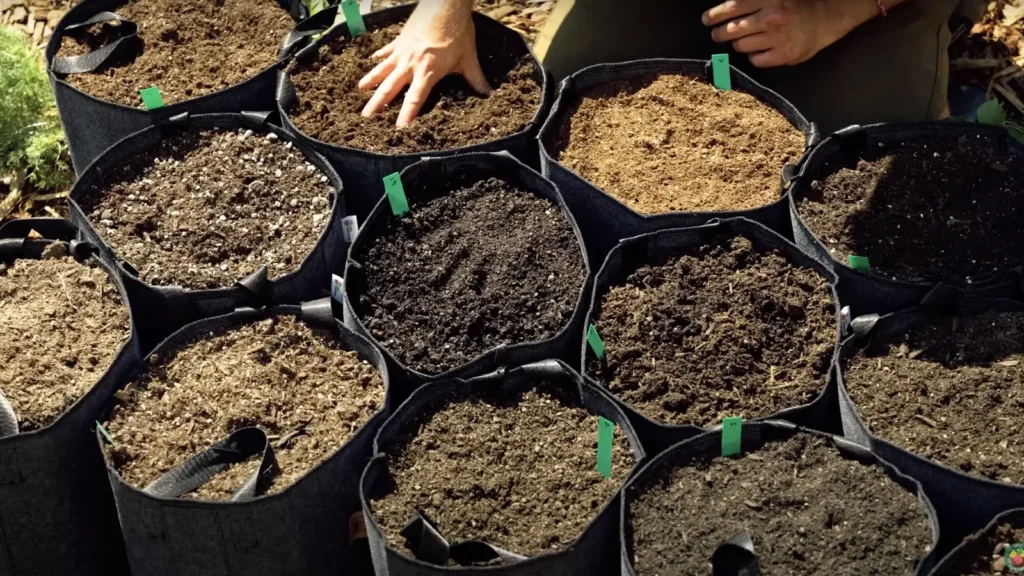
Beyond Native Soil: Specialized Growing Mediums
While understanding and amending your native garden soil is crucial, many gardening scenarios call for specialized growing mediums. Container gardening, raised beds, and even starting seeds indoors often require mixes that differ significantly from the soil found in your backyard. These specialized mediums are designed to provide optimal conditions for specific growing needs, offering advantages in drainage, aeration, and nutrient control.
Potting Mixes: The Foundation for Container Gardening
For any plant grown in a pot, container, or hanging basket, a high-quality potting mix (also known as potting soil or container mix) is essential. Unlike garden soil, potting mixes are typically soilless, meaning they contain little to no actual mineral soil. Instead, they are composed of various organic and inorganic materials blended to create an ideal environment for containerized plants.
Common Components of Potting Mixes:
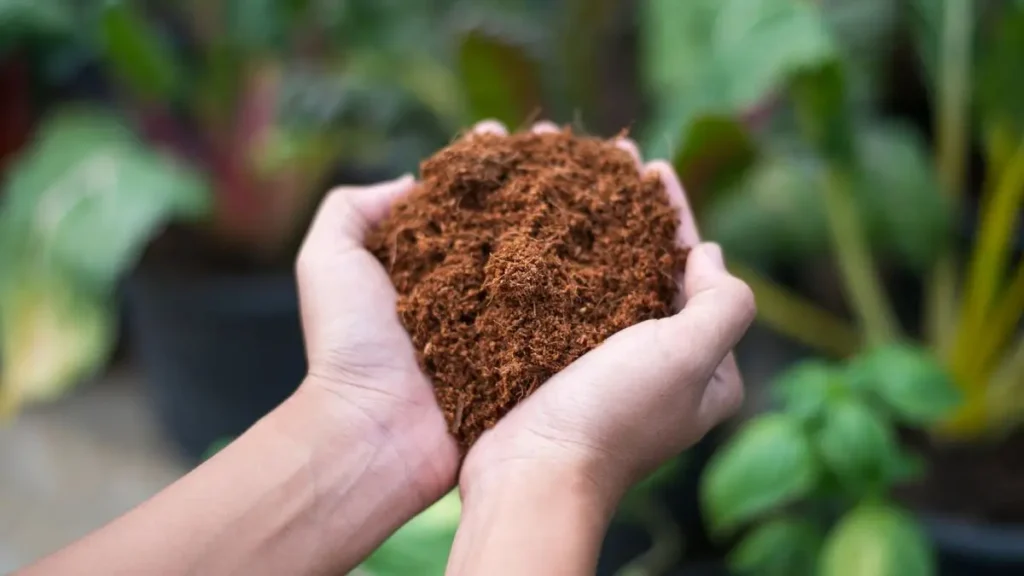
- Peat Moss or Coir: These provide excellent water retention and aeration. Peat moss is acidic, while coir (coconut fiber) is pH neutral.
- Perlite or Vermiculite: These lightweight, porous materials improve drainage and aeration. Perlite is volcanic glass that expands when heated, while vermiculite is a mineral that expands when heated.
- Compost or Composted Bark: Adds nutrients, improves water retention, and introduces beneficial microorganisms.
- Sand (Coarse): Sometimes included to improve drainage, especially in mixes for cacti and succulents.
- Wetting Agents: Some commercial mixes include these to help the mix absorb water more readily, as peat-based mixes can become hydrophobic when dry.
- Slow-Release Fertilizers: Many commercial potting mixes come pre-fertilized to provide initial nutrients for plants.
Why Not Use Garden Soil in Pots?
Using native garden soil in containers is generally discouraged because it tends to compact easily in a confined space, leading to poor drainage, inadequate aeration, and root rot. Garden soil can also introduce pests, diseases, and weed seeds into your containers.
Raised Bed Soil: Custom Blends for Elevated Gardens
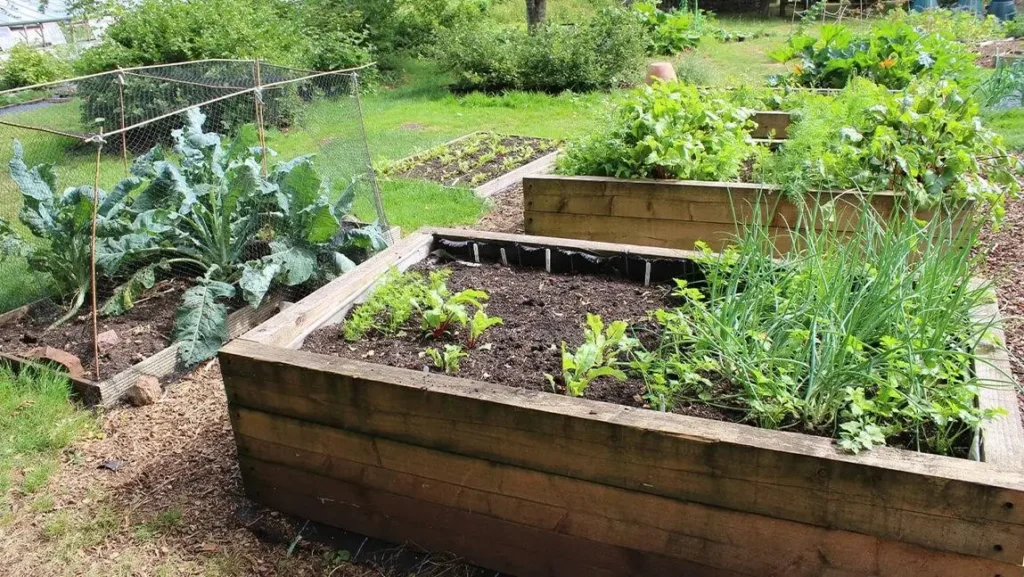
Raised beds offer numerous advantages, including better drainage, warmer soil temperatures, and easier access for gardening. Filling a raised bed effectively involves creating a custom soil blend that balances drainage, water retention, and nutrient content. While you can use a mix of native soil and amendments, many gardeners opt for a layered approach or a specific blend.
Ideal Raised Bed Soil Composition:
A common and effective blend for raised beds is a mixture of:
- Topsoil (50-60%): Provides the bulk and mineral content. Ensure it’s good quality, screened topsoil.
- Compost (30-40%): Adds organic matter, nutrients, and improves soil structure. This is crucial for fertility.
- Coarse Sand or Perlite (10-20%): Enhances drainage and aeration, especially important in deeper beds.
Some gardeners also incorporate a
layer of woody debris, logs, or branches at the very bottom of deep raised beds (Hugelkultur method) to provide long-term organic matter and improve drainage.
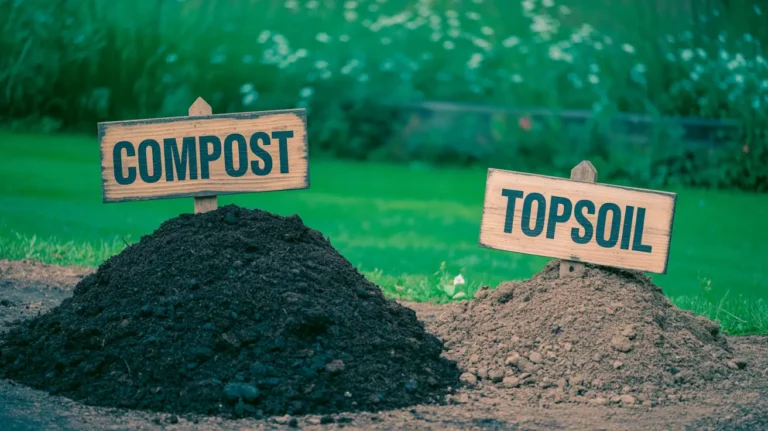
Topsoil vs. Garden Soil: Understanding the Differences
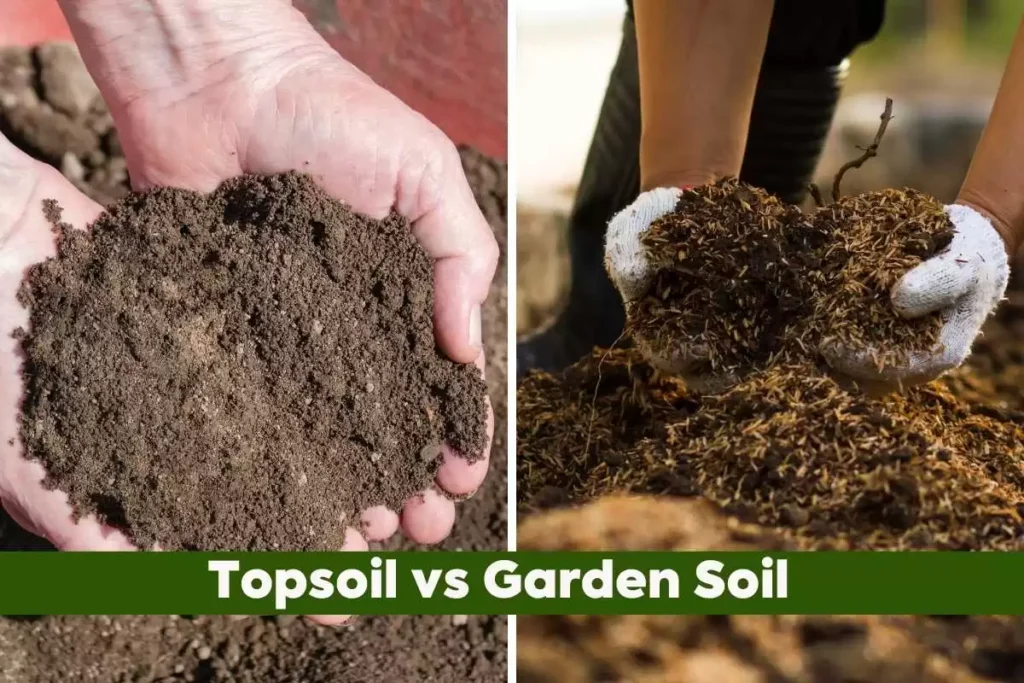
Topsoil and garden soil are often used interchangeably, but they refer to different products with distinct uses:
- Topsoil: This is the uppermost layer of natural soil, typically rich in organic matter and nutrients. It’s primarily used for leveling, filling, or as a base layer for new lawns or garden beds. Quality can vary significantly, so it’s important to source from reputable suppliers.
- Garden Soil: This is a blended product, often fortified with compost and other amendments, designed specifically for improving existing garden beds or creating new ones. It’s typically richer and more balanced than raw topsoil, making it ready for planting. Garden soil is ideal for mixing into your native soil to enhance its structure and fertility.
Understanding these distinctions ensures you choose the right product for your specific gardening project, leading to healthier plants and more successful outcomes.
Advanced Soil Management Techniques for Optimal Plant Health
Once you understand your soil type and its fundamental properties, you can elevate your gardening game by implementing advanced soil management techniques. These practices go beyond basic amendments, focusing on long-term soil health, fertility, and sustainability. By mimicking natural processes, you can create a vibrant, living soil ecosystem that actively supports robust plant growth.
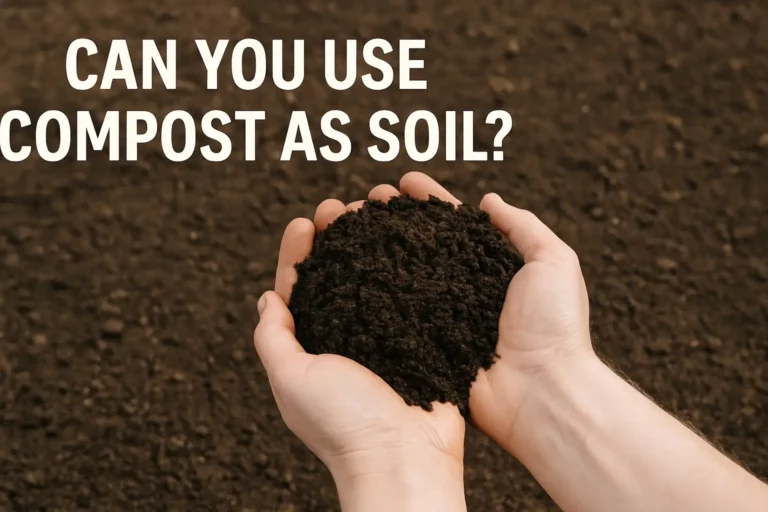
Composting: Gold for Your Garden
Composting is arguably the single most beneficial practice for improving any soil type. It’s the natural process of recycling organic matter—such as kitchen scraps, yard waste, and leaves—into a rich, dark, nutrient-dense material called compost. This
“black gold” is teeming with beneficial microorganisms and provides a slow-release source of nutrients, improving soil structure, water retention, and aeration. Regularly incorporating compost into your garden beds will transform even the most challenging soils into fertile ground, fostering a thriving microbial community that is essential for plant vitality.
Cover Cropping: Nature’s Soil Builder
Cover cropping involves planting specific crops, not for harvest, but to benefit the soil. These
“green manures” are typically planted during off-seasons (e.g., after harvest in autumn) and then tilled into the soil before the next planting season. Cover crops offer a multitude of benefits: they prevent soil erosion, suppress weeds, add organic matter, improve soil structure, and some (legumes) even fix atmospheric nitrogen, reducing the need for synthetic fertilizers. Popular cover crops include clover, vetch, rye, and buckwheat. This practice is a cornerstone of regenerative agriculture, building soil health naturally over time.
No-Till Gardening: Preserving Soil Structure
No-till (or minimum-till) gardening is a practice that minimizes disturbance of the soil. Instead of digging or tilling, organic matter is added to the soil surface as mulch, allowing natural processes (like earthworms and microbial activity) to build soil structure. This approach preserves the intricate networks of fungi and bacteria that are vital for nutrient cycling and plant health. No-till gardening reduces erosion, improves water infiltration, and fosters a healthier soil microbiome, leading to more resilient plants and less work for the gardener in the long run.
Crop Rotation: Maintaining Soil Fertility
Crop rotation is the practice of growing a series of different types of crops in the same area across a sequence of growing seasons. This technique is crucial for maintaining soil fertility and preventing the buildup of pests and diseases. Different plant families have varying nutrient requirements and disease susceptibilities. By rotating crops, you can break disease cycles, manage pest populations, and ensure that different nutrients are utilized from the soil, preventing depletion of specific elements. For example, following a heavy-feeding crop like corn with a nitrogen-fixing legume like beans can replenish soil nitrogen naturally.
Troubleshooting Common Soil Problems
Even with the best intentions and management practices, gardeners may encounter common soil problems that can hinder plant growth. Recognizing the signs of these issues and knowing how to address them is crucial for maintaining a healthy and productive garden. Here, we’ll explore some of the most frequent soil challenges and their practical solutions.
Compacted Soil: Causes and Solutions
Compacted soil is a widespread problem, particularly in areas with heavy foot traffic, frequent use of garden machinery, or naturally dense soil types like clay. When soil becomes compacted, its particles are pressed together, reducing the pore spaces essential for air and water movement. This leads to poor drainage, reduced oxygen availability for roots, and difficulty for roots to penetrate the soil, ultimately stunting plant growth.
Signs of Compacted Soil:
- Water puddles on the surface after rain or irrigation and drains very slowly.
- Stunted plant growth, even with adequate fertilization.
- Hard, dense soil that is difficult to dig into.
- Roots growing horizontally rather than penetrating deeply.
Solutions for Compacted Soil:
- Aeration: For lawns, mechanical aerators can remove small plugs of soil, creating channels for air and water. For garden beds, broadforking or manual aeration with a garden fork can help. Avoid tilling when the soil is wet, as this can worsen compaction.
- Incorporate Organic Matter: This is the most effective long-term solution. Adding generous amounts of compost, well-rotted manure, or other organic materials will gradually improve soil structure, creating stable aggregates and increasing pore space. Organic matter acts as a natural soil conditioner.
- Minimize Foot Traffic: Create designated pathways in your garden beds to avoid walking on the soil where plants are growing. Use raised beds to eliminate the need to step on the growing medium.
- Mulching: A thick layer of organic mulch (e.g., wood chips, straw) helps protect the soil from the impact of heavy rain, which can contribute to compaction.
Poor Drainage: Identifying and Fixing Waterlogging
Poor drainage, often a symptom of compacted soil or a high clay content, leads to waterlogging. When soil remains saturated for extended periods, plant roots are deprived of oxygen, leading to root rot and eventually plant death. Identifying and addressing drainage issues is critical for plant survival.
Signs of Poor Drainage:
- Standing water in garden beds long after rain.
- Plants wilting even when the soil is wet (a sign of root rot).
- Foul odor from the soil (indicating anaerobic conditions).
- Algae or moss growth on the soil surface.
Solutions for Poor Drainage:
- Improve Soil Structure: Again, incorporating significant amounts of organic matter is paramount. This will create larger pore spaces and improve the soil’s ability to drain excess water while retaining sufficient moisture.
- Raised Beds: Building raised beds is an excellent way to overcome severe drainage issues, as you can fill them with a custom, well-draining soil mix.
- French Drains or Swales: For larger areas or persistent problems, installing a French drain (a trench filled with gravel and a perforated pipe) or creating swales (shallow depressions that collect and direct water) can help divert excess water away from planting areas.
- Select Water-Tolerant Plants: As a last resort, or in conjunction with other methods, choose plants that are known to tolerate or even thrive in moist conditions.
Nutrient Deficiencies: Signs and Remedies
Even if your soil has a good texture and drainage, plants can suffer from nutrient deficiencies if essential elements are lacking or unavailable. This can be due to low soil fertility, incorrect pH, or imbalances in nutrient ratios. Recognizing the visual cues of nutrient deficiencies is key to timely intervention.
Signs of Nutrient Deficiencies (Common Examples):
- Nitrogen (N) Deficiency: Yellowing of older leaves, starting from the tips and moving inward; stunted growth.
- Phosphorus (P) Deficiency: Purplish discoloration on leaves, especially on the undersides; stunted growth; poor flowering/fruiting.
- Potassium (K) Deficiency: Yellowing or browning along leaf margins (edges) of older leaves; weak stems.
- Iron (Fe) Deficiency: Yellowing between the veins of new leaves (interveinal chlorosis), while veins remain green.
Solutions for Nutrient Deficiencies:
- Soil Test: The most accurate way to diagnose nutrient deficiencies is through a professional soil test. This will tell you exactly which nutrients are lacking and provide specific recommendations for amendments.
- Adjust Soil pH: As discussed earlier, an incorrect pH can make nutrients unavailable. Adjusting the pH to the optimal range for your plants will often resolve deficiencies without adding more nutrients.
- Add Organic Matter: Compost and well-rotted manure are excellent sources of a wide range of macro and micronutrients, released slowly over time. They also improve the soil’s ability to hold onto nutrients.
- Targeted Fertilization: Based on soil test results, apply fertilizers that specifically address the identified deficiencies. Use balanced fertilizers for general feeding, or specialized fertilizers for specific nutrient needs. Always follow application rates to avoid over-fertilization, which can harm plants and the environment.
- Foliar Feeding: For quick, temporary relief of micronutrient deficiencies, applying a liquid fertilizer directly to plant leaves (foliar feeding) can provide a rapid uptake of nutrients.
By proactively addressing these common soil problems, you can ensure your plants remain healthy, vigorous, and productive throughout the growing season.
Empowering Your Green Thumb
Congratulations! You’ve journeyed through the intricate world of soil, from understanding its fundamental composition to mastering advanced management techniques. This guide has aimed to equip you with the knowledge and practical skills necessary to transform your gardening approach from guesswork to informed success. Remember, the health of your plants is inextricably linked to the health of your soil.
Recap of Key Takeaways
We’ve covered a lot of ground, but here are the core principles to carry forward:
- Soil is Alive: It’s a complex ecosystem of minerals, organic matter, water, air, and countless microorganisms, all working in concert to support plant life.
- Know Your Type: Identifying your primary soil type (clay, sand, silt, loam, peat, chalk) is the first step to understanding its inherent strengths and weaknesses.
- Texture Matters: The proportion of sand, silt, and clay dictates drainage, aeration, and nutrient retention. Simple tests like the jar and feel tests can reveal your soil’s texture.
- pH is Paramount: Soil pH controls nutrient availability. Testing and adjusting pH to suit your plants’ preferences is crucial for their health.
- Organic Matter is Gold: Regardless of your soil type, consistently adding organic matter (compost, well-rotted manure) is the single most effective way to improve its structure, fertility, and overall vitality.
- Specialized Needs: For containers and raised beds, specialized potting mixes and custom blends offer optimal growing environments.
- Proactive Management: Techniques like composting, cover cropping, no-till gardening, and crop rotation build long-term soil health and reduce common problems.
- Troubleshoot Wisely: Recognize signs of compaction, poor drainage, and nutrient deficiencies, and apply targeted solutions.
Continuous Learning and Observation
Gardening is a journey of continuous learning and observation. Your soil is a dynamic entity, constantly evolving with the seasons, weather patterns, and your gardening practices. Pay attention to how your plants are performing, observe the changes in your soil, and don’t be afraid to experiment with different amendments and techniques. Every successful harvest and every thriving plant will be a testament to your growing understanding of this vital foundation.
Your Journey to a Thriving Garden
Armed with this comprehensive guide, you are now empowered to make informed decisions about your soil. By nurturing the soil beneath your feet, you’re not just growing plants; you’re cultivating a healthier ecosystem, fostering biodiversity, and ultimately, creating a more beautiful and productive garden. So, roll up your sleeves, get your hands dirty, and embark on your journey to a truly thriving garden!