Soil Tests for Garden: Unlocking Your Garden’s Full Potential
Unlocking Your Garden’s Potential with Soil Testing
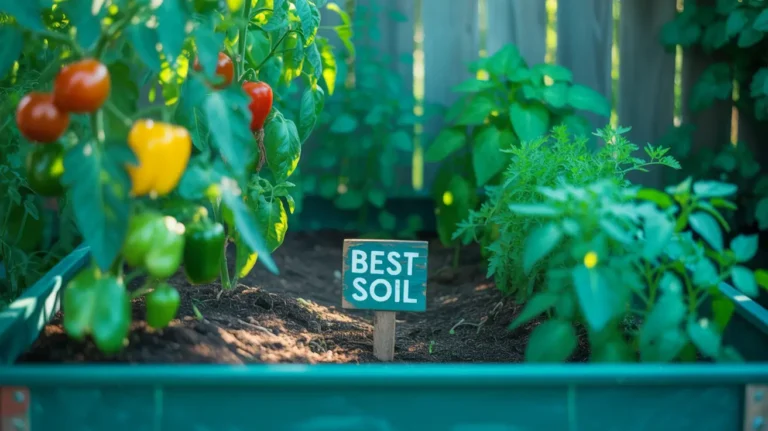
The Foundation of a Thriving Garden: Why Soil Matters
Every successful garden, whether a sprawling vegetable patch or a vibrant flower bed, begins with its most fundamental element: the soil. Often overlooked or underestimated, soil is far more than just a medium for plants to stand in; it is a complex, living ecosystem teeming with microorganisms, essential nutrients, and intricate chemical processes.
Healthy soil provides the crucial support system that plants need to thrive. It influences everything from root development and nutrient uptake to disease resistance and overall yield. It acts as a reservoir for water and nutrients, a buffer against environmental stresses, and a dynamic environment where life flourishes beneath the surface.
Understanding the composition and health of your garden’s soil is not merely a recommendation; it is the cornerstone of sustainable and productive gardening. Without a robust and balanced soil foundation, even the most meticulously chosen plants and diligent care can fall short of their potential. This leads to stunted growth, nutrient deficiencies, and increased susceptibility to pests and diseases. Therefore, cultivating a truly thriving garden necessitates a deep appreciation for, and proactive management of, this vital natural resource.
Beyond Guesswork: The Power of Soil Testing
For many gardeners, the approach to soil management often involves a degree of guesswork. Fertilizers are applied based on general recommendations, and amendments are added in hopes of addressing perceived deficiencies. However, this trial-and-error method can be inefficient, costly, and potentially detrimental to your plants and the environment.
Over-fertilization, for instance, can lead to nutrient imbalances, chemical burn, and harmful runoff into waterways. Under-fertilization, conversely, can starve your plants of essential elements, hindering their growth and productivity. This is where the power of soil testing becomes indispensable.
A comprehensive soil test provides a precise, data-driven snapshot of your soil’s current condition. It reveals its pH level, nutrient content, organic matter percentage, and even its texture. It transforms guesswork into informed decision-making, allowing you to apply exactly what your soil needs, in the right amounts, and at the optimal time.
This targeted approach not only maximizes the health and vigor of your plants but also promotes environmental stewardship by minimizing waste and preventing nutrient pollution. By embracing soil testing, you move beyond assumptions and empower yourself with the scientific insights necessary to cultivate a truly optimized and sustainable garden.
What You’ll Learn: A Comprehensive Guide to Soil Testing for Gardeners
This comprehensive guide is designed to demystify the process of soil testing and equip you with the knowledge and tools to unlock your garden’s full potential. We will delve into the critical reasons why soil testing is an essential practice for every gardener.
We’ll explore how it helps you understand your soil’s unique characteristics, from its pH and nutrient profile to its physical composition. We will meticulously compare the advantages and limitations of both professional laboratory tests and various DIY methods, guiding you in choosing the most appropriate approach for your specific needs.
A detailed, step-by-step walkthrough of the soil sampling process will ensure you collect accurate and representative samples, a crucial factor for reliable results. Furthermore, we will provide a clear and actionable interpretation guide for your soil test reports, translating complex scientific data into practical recommendations for amending your soil and optimizing plant health.
Beyond the initial test, we will discuss strategies for maintaining long-term soil health through sustainable practices and continuous observation. For those seeking deeper insights, we will also touch upon advanced testing considerations, such as micronutrient and soil biology analysis. By the end of this guide, you will possess a profound understanding of soil testing, enabling you to make informed decisions that lead to a more vibrant, productive, and resilient garden. Prepare to transform your gardening approach from guesswork to precision, and witness the remarkable difference it makes.
Why Soil Testing is Non-Negotiable for Every Gardener
Understanding Your Soil’s DNA: pH, Nutrients, and Texture
Just as a doctor relies on diagnostic tests to understand a patient’s health, a gardener needs a soil test to truly comprehend the well-being of their garden. Soil is a complex matrix, and its composition directly impacts plant vitality. A soil test provides a detailed analysis of its fundamental properties: pH, nutrient levels, and texture. These three factors are the pillars of soil health, and understanding them is crucial for successful gardening.
1. The pH Puzzle: Acidity, Alkalinity, and Nutrient Availability
Soil pH is a measure of its acidity or alkalinity, expressed on a scale from 0 to 14. A pH of 7 is neutral, values below 7 indicate acidity, and values above 7 indicate alkalinity. This single metric is profoundly important because it dictates the availability of nutrients to plants.
Most garden plants thrive in a slightly acidic to neutral pH range (6.0 to 7.0). This is where essential nutrients are most soluble and accessible. If the pH is too high or too low, even if nutrients are present in the soil, plants may be unable to absorb them, leading to deficiencies.
For example, in highly acidic soils, aluminum and manganese can become toxic. In alkaline soils, iron and phosphorus may become unavailable. Knowing your soil’s pH is the first step in ensuring your plants can effectively feed themselves.
2. The Nutrient NPK: Nitrogen, Phosphorus, and Potassium Explained
Beyond pH, a soil test quantifies the levels of macronutrients: Nitrogen (N), Phosphorus (P), and Potassium (K) – often referred to as NPK. These three elements are required by plants in the largest quantities and play distinct, vital roles in plant growth and development.
Nitrogen is crucial for leafy growth and vibrant green foliage. Phosphorus is essential for strong root development, flowering, and fruiting. Potassium contributes to overall plant vigor, disease resistance, and water regulation.
A soil test will reveal if your soil has sufficient levels of these nutrients, or if supplementation is necessary. Applying NPK fertilizers without a soil test is akin to taking vitamins without knowing if you have a deficiency – it could be wasteful or even harmful.
3. Micronutrients: The Unsung Heroes of Plant Health
While NPK are the stars, micronutrients are the unsung heroes of plant health. These include elements like iron, manganese, zinc, copper, boron, and molybdenum. They are needed in much smaller quantities but are no less critical for plant physiological processes.
A deficiency in even one micronutrient can lead to significant growth problems and visible symptoms in plants. For instance, iron deficiency often manifests as yellowing leaves (chlorosis) between the veins. While many basic soil tests focus on macronutrients, some professional labs offer comprehensive analyses that include micronutrient levels, providing a more complete picture of your soil’s nutritional profile.
4. Soil Texture: Sand, Silt, Clay, and Loam – What It Means for Your Plants
Soil texture refers to the proportion of sand, silt, and clay particles in your soil. Sand particles are the largest, providing good drainage and aeration but poor water and nutrient retention. Clay particles are the smallest, offering excellent water and nutrient retention but often leading to poor drainage and compaction.
Silt particles are intermediate, balancing the properties of sand and clay. The ideal soil texture for most garden plants is loam, a balanced mix of all three. This provides good drainage, aeration, and nutrient retention.
A soil test can help you understand your soil’s texture. This, in turn, informs decisions about drainage, irrigation, and the types of amendments needed to improve its physical structure. For example, sandy soils benefit from organic matter to improve water retention, while clay soils benefit from organic matter to improve drainage and reduce compaction.
Avoiding Common Pitfalls: Over-fertilization and Nutrient Imbalances
One of the most significant advantages of soil testing is its ability to prevent over-fertilization and the subsequent creation of nutrient imbalances. Without a clear understanding of what your soil already contains, there’s a natural tendency to apply more fertilizer, assuming it will lead to better growth.
However, excess nutrients can be just as detrimental as deficiencies. For example, too much phosphorus can inhibit the uptake of other essential micronutrients like iron and zinc, leading to new deficiencies. Similarly, excessive nitrogen can promote lush leafy growth at the expense of flowering and fruiting. It can also make plants more susceptible to pests and diseases.
Beyond the direct harm to plants, over-fertilization contributes to environmental pollution. Excess nutrients, particularly nitrogen and phosphorus, can leach into groundwater or run off into surface waters. This leads to eutrophication – the excessive growth of algae and aquatic plants that depletes oxygen and harms aquatic life.
By providing precise recommendations, soil tests help you apply only what is necessary. This safeguards both your garden and the broader ecosystem.
Saving Time, Money, and Effort: The Long-Term Benefits
Investing in a soil test might seem like an added expense, but it is a wise investment that yields significant long-term savings in time, money, and effort. By knowing exactly what your soil needs, you avoid purchasing and applying unnecessary fertilizers and amendments.
This targeted approach reduces waste and ensures that every dollar spent on soil inputs is effective. Furthermore, healthy, well-nourished plants are more resilient, less prone to disease, and produce higher yields. This translates into a more productive and satisfying gardening experience.
You’ll spend less time troubleshooting plant problems, battling pests, and replacing struggling plants. In essence, a soil test is a proactive measure that streamlines your gardening efforts, making them more efficient, effective, and ultimately, more rewarding. It transforms gardening from a reactive struggle against unforeseen problems into a strategic and successful endeavor.
Also Read:
- Soil pH Adjustment: When and How to Use Lime and Sulfur
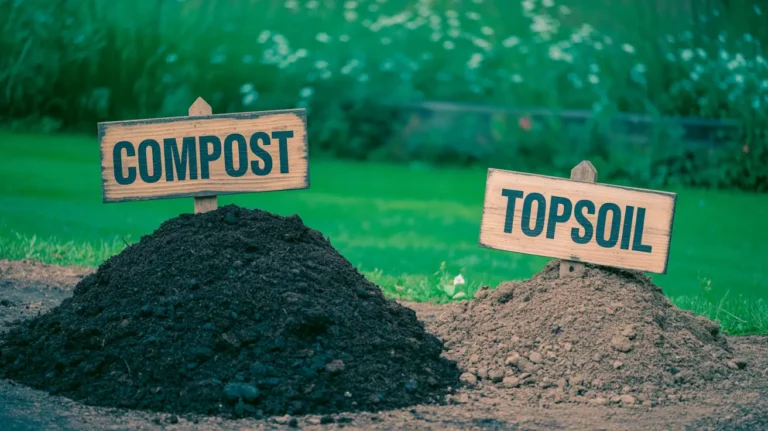
- Soil Types for Thriving Plants
- How Much Topsoil Do I Need?
Professional vs. DIY Soil Tests: Choosing the Right Approach
When considering soil testing for your garden, you essentially have two main avenues: professional laboratory testing or do-it-yourself (DIY) home kits and methods. Each approach has its merits and drawbacks. Understanding these differences is key to choosing the right option for your specific gardening goals and budget.
The Accuracy Advantage: What Professional Lab Tests Offer
Professional soil testing laboratories offer a level of precision, comprehensiveness, and reliability that DIY methods simply cannot match. These facilities are equipped with sophisticated analytical instruments and staffed by trained soil scientists. They can provide an in-depth understanding of your soil’s composition and health.
1. Comprehensive Analysis: Beyond the Basics
Professional labs conduct a far more extensive analysis than any home kit. While DIY kits typically provide basic pH and NPK readings, professional tests delve much deeper. They accurately measure macronutrients (Nitrogen, Phosphorus, Potassium, Calcium, Magnesium, Sulfur) and a wide array of micronutrients (Boron, Copper, Iron, Manganese, Molybdenum, Zinc, Chloride). These are crucial for plant health but often overlooked.
Furthermore, labs can assess organic matter content, cation exchange capacity (CEC), and even soil texture (percentage of sand, silt, and clay). This holistic view provides a complete picture of your soil’s fertility and physical properties, allowing for highly targeted amendments.
2. Tailored Recommendations: Specific to Your Garden’s Needs
Perhaps the most valuable aspect of professional soil testing is the personalized recommendations that accompany the results. Instead of generic advice, you receive specific guidance on how much and what type of amendments (e.g., lime, sulfur, fertilizers, organic matter) to apply to correct any deficiencies or imbalances.
These recommendations are often tailored to the specific plants you intend to grow, ensuring optimal conditions for their success. Many labs also provide insights into application rates and timing, taking the guesswork out of soil improvement. This level of customized advice is invaluable for maximizing plant health and yield.
3. Where to Find Reputable Labs: Extension Offices and Private Services
Reputable professional soil testing services are widely available. Your local Cooperative Extension Office, often affiliated with a state university, is an excellent starting point. These offices typically offer affordable testing services and provide results that are easy to understand, often with local expertise to help interpret them.
Additionally, there are numerous private soil testing laboratories that cater to gardeners and farmers. When choosing a lab, look for one that provides comprehensive analysis, clear reports, and actionable recommendations. A quick online search for “soil testing labs near me” or “agricultural soil testing services” will yield several options. It’s always a good idea to check reviews and inquire about their testing methodologies and reporting formats before sending in your sample.
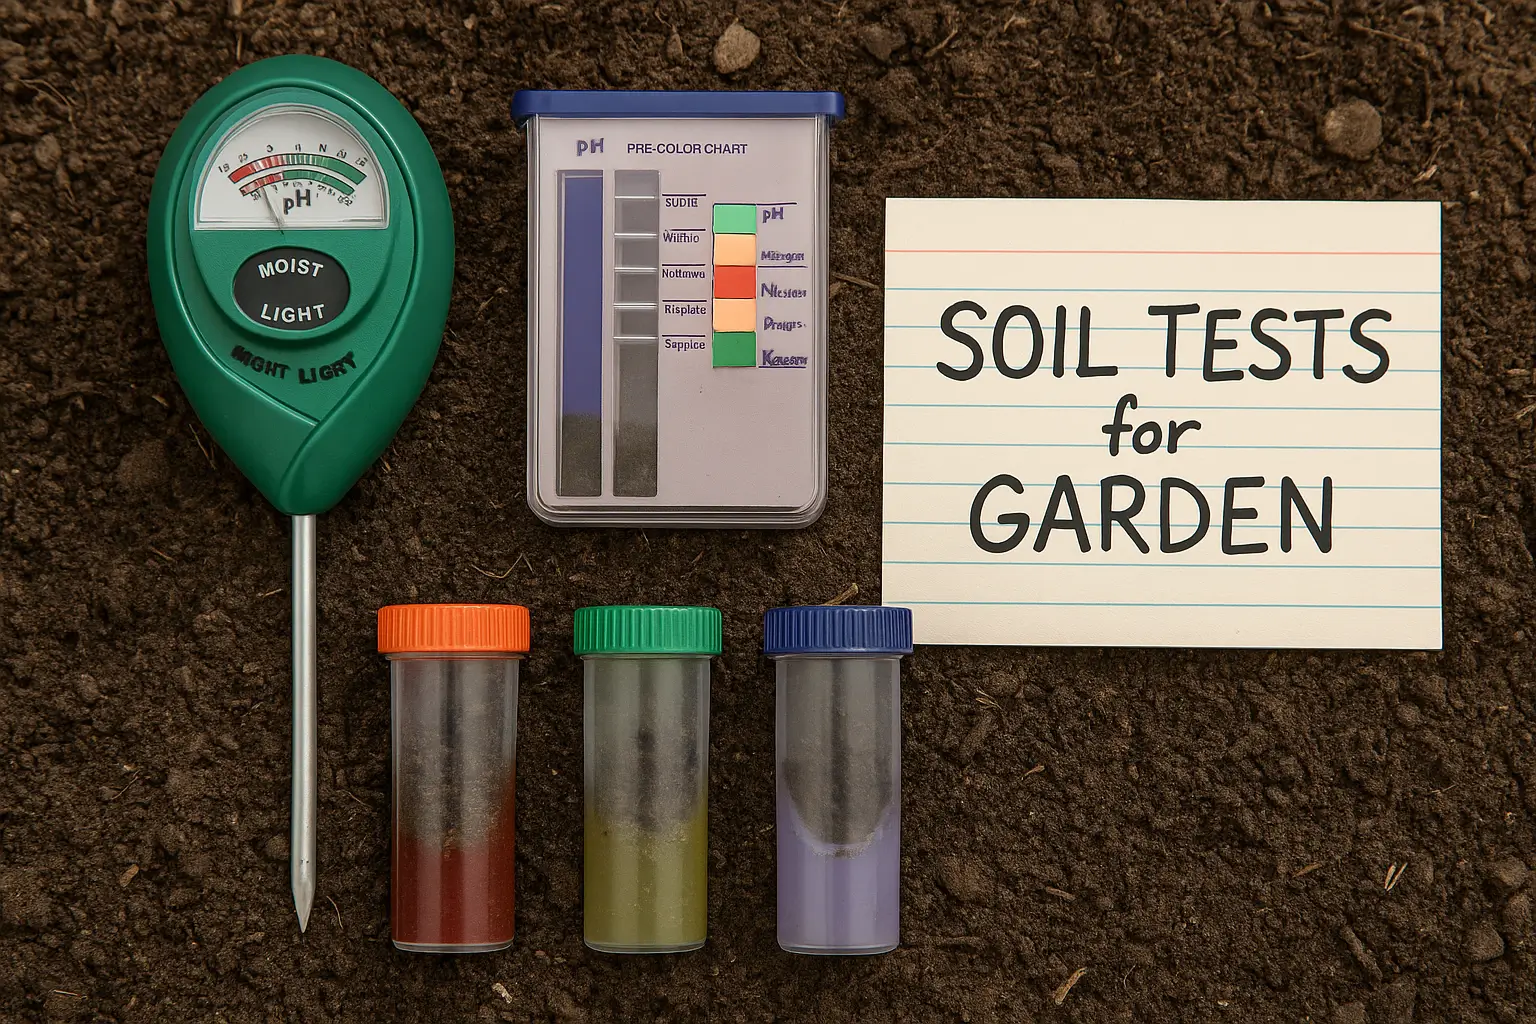
The Limitations of DIY: Why Homemade Tests Fall Short
While convenient and inexpensive, DIY soil test kits and homemade methods often fall short in providing the accurate and comprehensive data needed for effective soil management. Relying solely on these methods can lead to misdiagnoses and ineffective or even harmful amendments.
1. Inaccuracy and Inconsistency: The Risks of Guesswork
Many DIY soil test kits, particularly those that rely on color charts or simple chemical reactions, are notoriously inaccurate. The results can be highly variable depending on factors like water quality, temperature, and even the user’s interpretation of color changes. Homemade tests, such as the vinegar and baking soda pH test or the jar texture test, offer only a very rough indication of soil properties.
While they can be fun educational tools, they lack the precision required to make informed decisions about nutrient application. This inaccuracy can lead to applying too much or too little of a particular amendment, exacerbating existing problems or creating new ones.
2. Missing Critical Data: The Incomplete Picture
The most significant limitation of DIY tests is their inability to provide a complete picture of your soil’s health. They typically only measure pH and, at best, basic NPK levels. They rarely, if ever, provide information on micronutrients, organic matter content, or cation exchange capacity – all of which are vital for understanding soil fertility and structure.
Without this comprehensive data, you’re essentially working with an incomplete puzzle. This makes it difficult to address underlying issues or optimize your soil for specific plant needs. This can lead to ongoing plant health problems despite your best efforts.
When DIY Can Be Useful: Quick Checks and Educational Tools
Despite their limitations, DIY soil tests do have a place in a gardener’s toolkit. They can be useful for quick, informal checks or as educational tools, particularly for beginners. For instance, a simple pH test can give you a general idea of whether your soil is acidic or alkaline.
This might prompt you to pursue a more accurate professional test if the results are extreme. The jar test for soil texture can be a fun and engaging way to learn about the physical composition of your soil, even if it doesn’t provide precise percentages. These tests can serve as a starting point for understanding your soil.
However, they should not be relied upon for making critical decisions about soil amendments or nutrient management. For serious gardening, professional testing remains the gold standard.
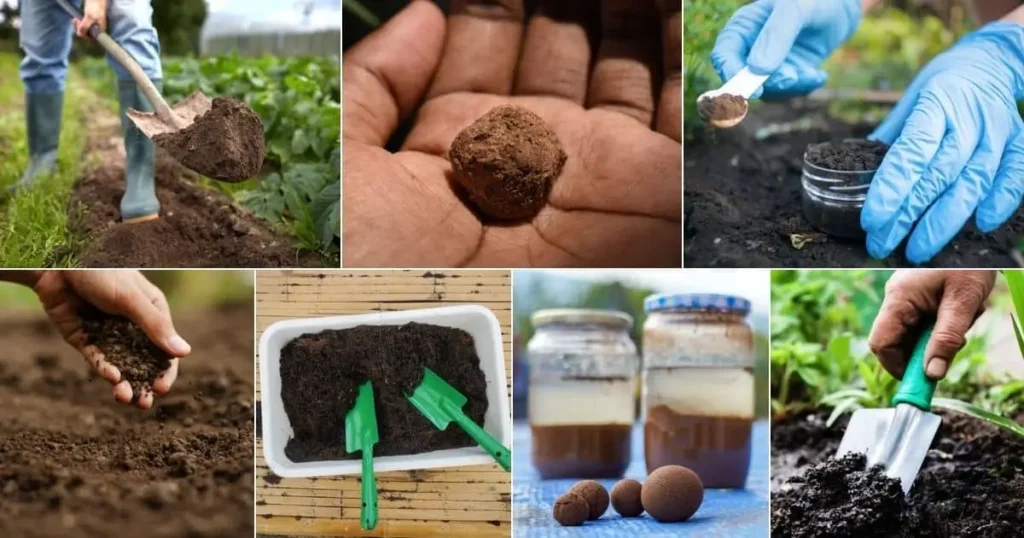
The Step-by-Step Guide to Collecting a Soil Sample
The accuracy of your soil test results hinges significantly on the quality of your soil sample. A poorly collected sample can lead to misleading data and, consequently, incorrect recommendations for amendments. Therefore, it is crucial to follow a precise, step-by-step process to ensure your sample is representative of your garden’s soil. This section will guide you through the best practices for collecting a soil sample, from timing to packaging.
Timing is Everything: When to Test Your Soil
The timing of your soil test can influence the results, particularly for nutrient levels. The ideal time to collect soil samples is typically in the late fall after the growing season has ended, or in early spring before new growth begins. Testing in the fall allows ample time to receive results and apply any recommended amendments, such as lime to adjust pH, which often requires several months to take effect.
Spring testing is also acceptable, but it’s important to collect samples before applying any fertilizers or amendments for the current growing season, as these can skew the results. Avoid testing immediately after heavy rainfall or during periods of extreme drought, as moisture levels can affect nutrient concentrations and the ease of sampling. Consistency is key: if you plan to test annually or biennially, try to collect your samples around the same time each year to allow for meaningful comparisons of results over time.
Tools of the Trade: What You’ll Need
Before you begin, gather the necessary tools to ensure a smooth and accurate sampling process. You will need:
- Clean Plastic Bucket: Avoid using metal buckets, especially galvanized ones, as they can contaminate the sample with trace metals like zinc, leading to inaccurate results.
- Soil Probe, Spade, or Trowel: A soil probe is ideal for taking consistent core samples. If you don’t have one, a clean spade or trowel can be used, but ensure it’s free of rust and any residues from previous use.
- Small Plastic Bag or Sample Container: For each individual sample collected.
- Permanent Marker: For labeling your samples clearly.
- Paper and Pen: To sketch a map of your garden and note sample locations.
- Distilled Water (Optional): For moistening very dry soil if necessary, though air-drying is generally preferred.
The Sampling Process: Ensuring Accuracy
To obtain a representative sample, it’s important to collect multiple subsamples from different areas within your garden and combine them. This accounts for natural variations in soil composition across your plot.
1. Preparing the Area: Clearing Debris
Before taking a sample, clear away any surface debris from the sampling spot. This includes grass, thatch, mulch, plant residues, leaves, and any other organic matter that has not yet decomposed into the soil. You want to sample the actual soil, not the surface layer.
2. Taking the Sample: Depth and Technique
The depth of your sample is critical, as nutrient levels can vary at different soil horizons. For most garden plants, collect samples from the top 6 to 8 inches of soil, which is typically the root zone. If using a soil probe, insert it to the desired depth and extract a core. If using a spade or trowel, dig a V-shaped hole to the appropriate depth, then cut a 1-inch slice of soil from one side of the V, ensuring the slice is uniform from top to bottom. Avoid sampling from areas that are obviously different, such as compost piles, pathways, or areas where fertilizers or amendments have recently been concentrated.
3. Combining Samples: For a Representative Overview
For each distinct area of your garden (e.g., vegetable garden, flower bed, lawn), collect 10-15 subsamples. These subsamples should be taken randomly across the area to ensure representativeness. For example, in a 10×10 foot vegetable bed, you might take a subsample from each corner, the center, and several points in between. Place all the subsamples from a single area into your clean plastic bucket. Once all subsamples are collected, thoroughly mix the soil in the bucket. This composite sample will provide an average representation of the soil conditions in that specific garden area. If you have distinct areas with different plants or soil conditions, treat them as separate sampling zones and create separate composite samples for each.
4. Labeling and Packaging: Essential for Accurate Results
Once your composite sample is thoroughly mixed, remove approximately one cup of the mixed soil and place it into a clean plastic bag or the sample container provided by the testing lab. If the soil is very wet, spread it out on a clean surface (like newspaper) and allow it to air dry indoors overnight before packaging; do not use artificial heat, as this can alter the chemical composition. Label each bag clearly with a permanent marker, including your name, the date, and a unique identifier for the sample (e.g., “Vegetable Garden,” “Rose Bed”). It is highly recommended to create a simple map of your garden, noting where each sample was taken. This will be invaluable when you receive your results and need to apply amendments to specific areas. Follow the specific packaging and shipping instructions provided by your chosen soil testing laboratory to ensure your sample arrives intact and is processed correctly.
Deciphering Your Soil Test Results: A Gardener’s Interpretation Guide
Receiving your soil test results can feel like deciphering a foreign language, filled with numbers, abbreviations, and scientific terms. However, understanding this report is the key to transforming raw data into actionable strategies for a healthier, more productive garden. This section will break down the common components of a soil test report and guide you on how to interpret them to make informed decisions.
Understanding the Numbers: Key Metrics and What They Mean
While every lab report may look slightly different, most will provide information on pH, macronutrients, and often organic matter. Here’s what to look for:
1. The pH Values: Ideal Ranges for Different Plants
As discussed earlier, pH is a measure of soil acidity or alkalinity, expressed on a scale from 0 to 14. A pH of 7.0 is neutral. Values below 7.0 are acidic, and values above 7.0 are alkaline. The ideal pH range for most garden vegetables and flowers is between 6.0 and 7.0, as this range optimizes the availability of most essential nutrients.
However, some plants, like blueberries and azaleas, prefer more acidic conditions (pH 4.5-5.5). Others, such as lavender and clematis, tolerate or prefer slightly alkaline soils. Your report may also include a “buffer pH” or “lime requirement” which indicates how much lime is needed to raise the pH of acidic soils. This is a crucial number, as it accounts for the soil’s buffering capacity – its resistance to changes in pH.
2. Nutrient Levels: Deficiencies and Excesses
Your report will list the concentrations of various nutrients, usually in parts per million (ppm) or pounds per acre (lbs/acre). Key macronutrients include:
- Phosphorus (P): Essential for root development, flowering, and fruiting. Low levels indicate a need for phosphorus-rich fertilizers or amendments like bone meal or rock phosphate. High levels can tie up other nutrients, so avoid adding more.
- Potassium (K): Important for overall plant vigor, water regulation, and disease resistance. Deficiencies can be corrected with potash, greensand, or wood ashes. Excess potassium is less common but can sometimes interfere with calcium and magnesium uptake.
- Calcium (Ca) and Magnesium (Mg): These are secondary macronutrients vital for cell wall formation and chlorophyll production, respectively. Their levels are often linked to pH. Dolomitic lime can raise pH while adding both calcium and magnesium, while calcitic lime primarily adds calcium. Epsom salts can provide magnesium.
- Nitrogen (N): While crucial for leafy growth, nitrogen levels are often not reported in standard soil tests because nitrogen is highly mobile in the soil and its levels fluctuate rapidly. Recommendations for nitrogen are usually based on the type of plants you are growing and the organic matter content of your soil, rather than a specific test result. Labs will often provide a general nitrogen recommendation.
Micronutrients like Iron (Fe), Manganese (Mn), Zinc (Zn), Copper (Cu), and Boron (B) may also be reported. These are needed in small amounts, but deficiencies can cause significant plant problems. Your report will typically indicate whether levels are deficient, adequate, or excessive, along with recommendations for correction.
3. Organic Matter: The Lifeblood of Healthy Soil
Organic matter (OM) is the decomposed remains of plants and animals. It is a critical component of healthy soil. Your report will show organic matter as a percentage. A healthy garden soil typically has an organic matter content of 3-5% or higher.
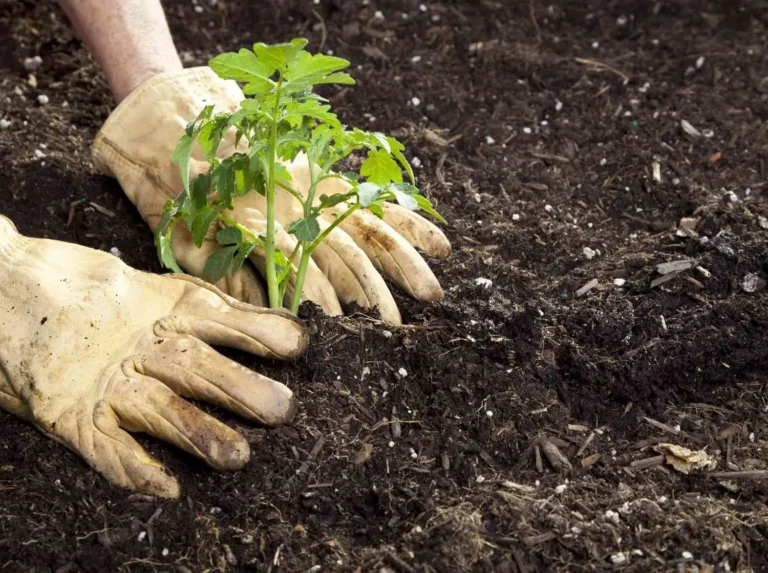
Organic matter improves soil structure, increases water retention in sandy soils, enhances drainage in clay soils, provides a slow-release source of nutrients, and supports beneficial microbial life. If your organic matter percentage is low, the recommendation will almost always be to incorporate more compost, well-rotted manure, or other organic amendments. This is one of the most beneficial long-term investments you can make in your garden’s health.
Actionable Recommendations: Translating Data into Garden Success
The most valuable part of your soil test report is the set of recommendations provided by the lab. These are tailored to your specific soil conditions and often to the types of plants you indicated you are growing. Follow these recommendations carefully to optimize your soil.
1. Adjusting pH: Lime and Sulfur Applications
If your soil pH is outside the optimal range for your plants, the report will recommend amendments to adjust it. To raise acidic pH (make it more alkaline), agricultural lime (calcium carbonate) or dolomitic lime (calcium magnesium carbonate) is typically recommended. The amount will depend on your current pH, target pH, and soil type.
To lower alkaline pH (make it more acidic), elemental sulfur is commonly used. These amendments should be applied evenly and incorporated into the soil, ideally in the fall, to allow time for them to react with the soil before the next growing season.
2. Nutrient Amendments: Organic and Synthetic Options
Based on nutrient deficiencies, the report will suggest specific fertilizers or amendments. These recommendations might be given in terms of elemental nutrients (e.g., pounds of phosphorus per acre) or specific products. You can choose between synthetic fertilizers, which provide readily available nutrients, or organic amendments, which release nutrients more slowly and also contribute to organic matter.
For example, if phosphorus is low, you might use a synthetic superphosphate or an organic option like bone meal. Always apply amendments according to the recommended rates to avoid over-application and potential harm to plants or the environment.
3. Improving Soil Structure: The Role of Organic Matter
Regardless of your soil type (sandy, silty, or clay), increasing organic matter content is almost always beneficial. Your report might explicitly recommend adding organic matter if levels are low. Incorporating compost, well-rotted manure, leaf mold, or other organic materials will improve soil structure, enhance water and nutrient retention, and foster a healthy microbial community.
This is a continuous process, as organic matter is constantly being consumed by soil organisms and needs to be replenished regularly. Consistent additions of organic matter will lead to a more resilient and productive garden over time.
Also Read
Maintaining Soil Health: Beyond the Initial Test
Soil testing is not a one-time event but rather an ongoing practice that forms a crucial part of a holistic soil management strategy. While an initial test provides a baseline understanding of your garden’s current condition, maintaining optimal soil health requires continuous attention and adaptation. This section will explore how to integrate soil testing into a long-term plan, emphasizing sustainable practices and the importance of observing your plants.
Regular Testing: How Often and Why It Matters
Even if your initial soil test results are excellent, soil conditions are dynamic and can change over time due to various factors. Nutrient levels can be depleted by plant uptake, leached by rainfall, or altered by the addition of amendments. pH can gradually shift due to irrigation water, organic matter decomposition, or the type of fertilizers used.
Therefore, regular soil testing is essential to monitor these changes and make timely adjustments. For most home gardens, retesting every 3 to 5 years is a good general guideline. However, you might consider more frequent testing (every 1-2 years) if:
- You are establishing a new garden or significantly changing planting areas.
- You are growing plants with very specific pH or nutrient requirements.
- You observe persistent plant health problems that are not attributable to pests or diseases.
- You have made significant soil amendments (e.g., large applications of lime or sulfur) and want to verify their effectiveness.
Regular testing allows you to track trends in your soil’s health, identify potential issues before they become severe, and fine-tune your amendment strategies. It provides a historical record that can inform future decisions and help you build increasingly resilient and productive soil over time.
Sustainable Practices: Composting, Cover Cropping, and Mulching
While soil tests guide specific amendments, sustainable gardening practices are fundamental to building and maintaining long-term soil health. These practices work in harmony with nature to create a thriving soil ecosystem:
- Composting: Regularly incorporating well-rotted compost is one of the most effective ways to improve soil health. Compost adds organic matter, which enhances soil structure, water retention, nutrient availability, and microbial activity. It’s a natural, slow-release fertilizer that feeds both your plants and the beneficial organisms in the soil.
- Cover Cropping: Planting cover crops (e.g., clover, vetch, rye) during off-seasons or in fallow beds offers numerous benefits. They protect the soil from erosion, suppress weeds, add organic matter when tilled in, and some, like legumes, can even fix atmospheric nitrogen, enriching the soil naturally.
- Mulching: Applying a layer of organic mulch (e.g., wood chips, straw, shredded leaves) around plants helps conserve soil moisture, regulate soil temperature, suppress weeds, and gradually adds organic matter as it decomposes. Mulch also provides a habitat for beneficial soil organisms and protects the soil from compaction due to heavy rain.
By integrating these practices, you create a self-sustaining soil system that requires fewer external inputs and is more resistant to environmental stresses. They complement the insights gained from soil testing, leading to a truly regenerative garden.
Observing Your Plants: Nature’s Own Indicators
Your plants themselves are often the first and most direct indicators of soil health issues. While a soil test provides quantitative data, visual observation offers qualitative insights. Learn to recognize the signs of nutrient deficiencies or excesses, which often manifest as specific leaf discolorations, stunted growth, or unusual plant habits. For example:
- Yellowing of older leaves: Often indicates nitrogen deficiency.
- Purplish discoloration: Can suggest phosphorus deficiency.
- Yellowing between leaf veins (chlorosis) on new growth: May point to iron or manganese deficiency.
- Stunted growth or poor flowering/fruiting: Could be a sign of overall nutrient imbalance or pH issues.
Keep a garden journal to note plant performance, unusual symptoms, and the timing of any amendments. This observational data, combined with your soil test results, creates a powerful feedback loop, allowing you to continuously refine your soil management strategies. By paying close attention to both the scientific data and the living indicators in your garden, you can become a more intuitive and effective gardener.
Also Read
Compost vs Topsoil for Lawn Calculator
Why Every Healthy Lawn Needs Good Soil
Advanced Soil Testing Considerations (Optional)
For gardeners who wish to delve deeper into the intricacies of their soil and optimize conditions for specific challenges or highly specialized crops, advanced soil testing offers a more granular level of insight. While not always necessary for general gardening, these tests can provide valuable information for troubleshooting persistent problems or achieving peak plant performance.
Micronutrient Testing: When and Why It’s Important
As previously discussed, micronutrients are essential elements required by plants in smaller quantities. However, their absence or imbalance can severely impact plant health. Standard soil tests often focus on macronutrients (N, P, K, Ca, Mg, S) and pH.
If your plants exhibit symptoms of nutrient deficiency despite adequate macronutrient levels, or if you are growing crops known to have high demands for specific micronutrients, a dedicated micronutrient test can be highly beneficial. These tests measure elements like Boron (B), Copper (Cu), Iron (Fe), Manganese (Mn), Molybdenum (Mo), and Zinc (Zn).
Deficiencies or excesses of these elements can lead to specific visual symptoms in plants, such as interveinal chlorosis (yellowing between leaf veins), stunted growth, or distorted new leaves. For example, iron deficiency is common in alkaline soils, while boron deficiency can affect fruit set. A micronutrient test can pinpoint the exact issue, allowing for precise, targeted applications of the missing element, avoiding the pitfalls of broad-spectrum fertilizers that might introduce unnecessary nutrients.
Soil Biology Testing: Understanding the Microbes Beneath Your Feet
Beyond the chemical and physical properties, soil is a living ecosystem. It is teeming with billions of microorganisms—bacteria, fungi, protozoa, nematodes, and more. These soil microbes play a critical role in nutrient cycling, organic matter decomposition, disease suppression, and overall soil health.
Traditional soil tests do not assess this vital biological component. Soil biology testing, though less common and often more expensive, can provide insights into the diversity and activity of these beneficial organisms. Tests might measure microbial biomass, enzyme activity, or the presence of specific beneficial fungi (like mycorrhizae) or bacteria.
Understanding your soil’s biological health can help you adopt practices that foster a thriving microbial community. These include reducing tillage, minimizing synthetic chemical inputs, and increasing organic matter. A healthy soil food web translates to healthier plants that are more resilient and less reliant on external inputs.
Contaminant Testing: Ensuring Soil Safety
In certain situations, particularly in urban environments, former industrial sites, or areas near old buildings, soil contamination can be a serious concern. Heavy metals (like lead, arsenic, cadmium) or persistent organic pollutants can accumulate in the soil. This poses risks to plant health and, more importantly, human health if consumed through garden produce.
If you suspect your garden soil might be contaminated—perhaps due to its history, proximity to busy roads, or the presence of old painted structures—a contaminant test is highly recommended. These specialized tests identify and quantify harmful substances. This allows you to make informed decisions about remediation, safe gardening practices (e.g., growing in raised beds with imported clean soil), or whether to garden in that location at all. Ensuring the safety of your garden soil is paramount, especially if you are growing edible crops.
Empowering Your Green Thumb with Knowledge
Recap: The Transformative Power of Soil Testing
Throughout this comprehensive guide, we have explored the multifaceted importance of soil testing for any gardener aspiring to cultivate a truly thriving and sustainable garden. We began by establishing soil as the living foundation of plant health, emphasizing that understanding its intricate composition is paramount.
We then delved into the critical reasons why soil testing is non-negotiable. We highlighted its role in deciphering the pH puzzle, quantifying essential macro and micronutrients, and revealing the vital importance of soil texture and organic matter. By moving beyond guesswork, soil testing empowers you to avoid the pitfalls of over-fertilization and nutrient imbalances, ultimately saving valuable time, money, and effort in the long run.
We meticulously compared professional laboratory tests, the gold standard for accuracy and comprehensive insights, with DIY methods, acknowledging their limited utility for quick checks and educational purposes. The step-by-step guide to collecting a representative soil sample underscored the importance of precision in this initial phase, ensuring that the data you receive is reliable.
Furthermore, we provided a detailed framework for interpreting your soil test reports, translating complex scientific data into practical recommendations for amending your soil and optimizing plant health. Finally, we looked beyond the initial test, emphasizing the continuous nature of soil health management through regular retesting, the integration of sustainable practices like composting, cover cropping, and mulching, and the invaluable role of observing your plants as natural indicators. For those seeking even deeper insights, we touched upon advanced considerations such as micronutrient, soil biology, and contaminant testing.
Final Thoughts: Cultivating a Thriving, Sustainable Garden
Ultimately, soil testing is more than just a scientific procedure; it is an act of informed stewardship. It represents a commitment to understanding and nurturing the very ground that sustains your garden. By embracing soil testing, you are not merely applying amendments; you are engaging in a dialogue with your soil, listening to its needs, and responding with precision and care.
This approach fosters a deeper connection to your garden, transforming you from a casual planter into a knowledgeable and empowered cultivator. A well-managed soil, guided by the insights from regular testing, leads to healthier, more resilient plants that are better equipped to resist pests and diseases, produce abundant yields, and withstand environmental stresses.
It also contributes to a more sustainable gardening practice, minimizing waste, reducing chemical runoff, and promoting a vibrant, living ecosystem beneath the surface. The journey to a truly thriving garden is an ongoing one, and soil testing provides the compass to navigate it successfully.
Take the First Step Towards Healthier Soil Today!
Are you ready to unlock your garden’s full potential and move beyond guesswork? The path to a more vibrant, productive, and sustainable garden begins with a single, informed step: get your soil tested today!
Whether you opt for the comprehensive insights of a professional laboratory or begin with a simple DIY check, understanding your soil’s unique needs is the most impactful action you can take. Don’t let nutrient deficiencies or pH imbalances hold your plants back any longer. Empower your green thumb with knowledge, and watch your garden flourish like never before. Your plants, and the planet, will thank you.